Showing posts with label nail fail. Show all posts

Thursday, March 20, 2014

Golden Oldies Thursday: Ruffle Mani

So, tonight's assignment, Ruffles, was pretty difficult for me.  I had planned to do both hands and wear it for a few days, but I gave up halfway through and only did one hand.  Another issue, I should've used cremes instead of holos because the holos tended to meld together making it just look like lumpy lines.  If I do this again, I'll definitely try it with cremes instead.  So, do you want to check out this nail fail?  If yes, scroll on down!

Here is the GOT Polish schedule of events if you would like to follow along or participate.


Remember the rules:

  • The polish you use must be at least a year old.
  • If you haven't been a polishaholic for that long, you can use the oldest polishes you have.
  • The polish should be previously used, but if you're stuck, you can use a polish from your untrieds stack.
  • You can use more than one polish as long as it fits the rules.
I purchased all polishes in this post.


For this mani, I used (from cuticle to tip): Color Club Cloud Nine, Color Club Miss Bliss, China Glaze QT, China Glaze TMI, OPI DS Vintage, and OPI DS Couture.


Since I wasn't entirely sure what a ruffle mani was, I went in search of some examples.  Lucky for me, the lady herself, Ms Crumpet, had a tutorial up on her blog that you can read here.  I used her concept to recreate this mani.


It bleeds together a bit, which I attribute to the holos and the light refraction melding the colors together.  Here's a pic of the mani in the shade so you can see the detail a bit better.  Oh, hai Fenway!


And here's a macro of it in the sunshine.


I know that it's probably not as bad as I'm making it out to be, but I just really didn't like it.  If I do it again, I'll need to practice for sure.  What do you think about this nail art technique?

All of these polishes are discontinued except for the Color Clubs, which you can still find online.

I purchased all polishes in this post.

Wednesday, February 5, 2014

Zoya Wednesday & Hare Bisbee

Tonight's post is going to be a quick one as I need to get back to packing up orders from last weekend's sale.  Let's take a look at Zoya Wednesday an Hare Bisbee, both of which were kind of a fail for me.  These photos were taken last summer, so please bear with any skin weirdness.  This was before I realized that I needed to use lanolin to help with my eczema and dryness.  Ok, let's get to it!


*I was not financially compensated for this post.  All items in this review were purchased by me for my own use.  The opinions are completely my own based on my experience.  For more information, please see my Disclosure Policy in the tab above.*

Zoya Wednesday 


Color:  Medium teal
Finish:  Crème – a flat polish that finishes smooth with full opacity.
Bottle / Brush:  Tapered bottle and cap - bottle tapers from a fat top to a smaller bottom making it a little harder to hold if you hold your bottles while you paint.  The tapered cap actually makes for easier application as it's shorter than most caps, but provides enough length to help guide application without being too wide where you grip it.  The wand and brush are a little short, but they have average application.
Opacity:  Medium – achieves opacity at three coats.
Glitter Application: N/A


Consistency: Medium – applies easily and doesn’t flood the cuticles.
Overall Ease of Application: Easy – applies well without pooling, dragging, streaking, or balding.  Spreads evenly and smoothly.
Stampability:  Not tested for stamping.
Dry Time:  Quick – dry to the touch without smudging in under 3 minutes.

Overall Thoughts:  There's not a whole lot to say about Wednesday.  It's your typical creme polish.  Personally, I feel the color is a bit too dark for my tastes, so I didn't really enjoy this mani.  However, other than my own personal color preferences, it was an easy polish to apply.

Hare Bisbee


Color:  Medium teal with gold hexes.
Finish:  Glitter Jelly – glitter in a colored jelly base.
Bottle / Brush:  Round bottle (i.e. Seche Vite) – the brush and wand are the standard width and length.  Easy to control and manipulate.


Opacity:  Medium – achieves opacity at three to four coats.  Here, however, I chose to wear it as one coat over Zoya Wednesday.
Glitter Application:  Medium – requires the dab method, but spreads evenly.


Consistency:  Thick – thick or it can be clumpy, but is easily remedied with some polish thinner.
Overall Ease of Application:  Medium – applies well with minimal pooling, dragging, streaking, or balding.  Spreads well without much manipulation.


Stampability:  Not designed for stamping.
Dry Time: Medium – dry to the touch with minimal smudging in 3-8 minutes.


Overall Thoughts:  Again, I'm just not a fan of this color of teal, nor am I a fan of gold.  So, this polish was a miss for me.  It's one of those things where you get swept up in the hype of a polish, but once you actually wear it, it's just not for you.  Application was typical for a Hare - thick with some pooling at the cuticles.  I knew to use one coat over undies, otherwise it would end up a thick disaster like my poor Bury the Hatchetfish mani.  Sadly, there were also a few taco glitters.  They stuck up so much that I could feel them through my topcoat even after I tried pushing them down into the base color a bit.  I don't have this polish anymore, otherwise, I'd pull it out to see how well it has held up over the past 9 months.  Overall, this mani just wasn't for me.  It's a pretty polish to look at on other people, but I ended up selling mine.

You can purchase Zoyas at Ulta and other beauty retailers.  You can purchase Hare at her store.

*I was not financially compensated for this post.  All items in this review were purchased by me for my own use.  The opinions are completely my own based on my experience.  For more information, please see my Disclosure Policy in the tab above.*

Thursday, August 15, 2013

Lynnderella Mysterious Ways

Tonight's post is going to be crazy quick, which means no Comparison Thursday.  Womp womp!  I've packaged up about 15 packages tonight, including all of the prizes that I sponsored for my giveaway (woot woot!), and I still have a lot to do before bed!  Although, I will let you guys in on a little secret...  I'm finally producing my own polishes for sale to the masses!!!  You'll need to follow my Blue-Eyed Girl Lacquers Facebook page to order!

Ok, so let's take a look at Lynnderella Mysterious Ways over Gelish Cashmere Kind of Girl.


*I was not financially compensated for this post.  All items in this review were purchased by me for my own use.  The opinions are completely my own based on my experience.  For more information, please see my Disclosure Policy in the tab above.*


Color: Sheer creamy grey base with silver metallic and holo and white glitters.
Finish: Glitter Crème – glitter in a crème base.


Bottle / Brush: Rectangle bottle – ribbed cap that is a little hard on the hands to open if you have sensitive skin.  The wand is the standard length, but the brush is a little too thin to pick up large / shaped glitter without fishing.  The brush's width is also an issue for spreading.  It doesn't fan out and pretty much requires you to dab polishes that are densely packed with glitter.
Opacity: Low – it requires several coats for opacity, but you'll never really get rid of visible nail line.  Here, however, I wore it as one coat over undies.


Glitter Application: Medium – requires the dab method, but spreads evenly.
Consistency: Medium – applies easily and doesn’t flood the cuticles.
Overall Ease of Application: Easy – applies well without pooling, dragging, streaking, or balding.  Spreads evenly and smoothly.


Stampability: Not designed for stamping.
Dry Time: Medium – dry to the touch with minimal smudging in 3-8 minutes.


Overall Thoughts:  This is is a bit of a fail for me.  Not because of the application of the polish, but the color!  I wanted to love dove greys, but they just don't look that great with my pinkie-red skin tone.  Also, I'm not a huge fan of those giant silver hexes.  Application was easy without too much difficulty in getting the glitters out of the bottle.  I wore this over dove grey Gelish Cashmere Kind of Girl, which also didn't look that great on me.  It's very disappointing, but since I"m a Lynn hoarder, this baby is hanging out in my stash still.  I'm thinking of trying it over another color.  Any suggestions?

You can purchase Lynnderellas at their store here.  Follow their fan-run Facebook, Twitter, and IG pages.  I purchased my Gelish from Sally's Beauty Supply, but you can find them much cheaper on Amazon.

Tuesday, June 18, 2013

ECOPOLO Summer Mani Challenge: Summer Floral

See?  I told you I'd be quicker about getting this week's challenge mani up!  Here's the weekly breakdown:


Well, these didn't turn out as nice as I was hoping.  Don't you hate it when you get an idea in your head but you simply just cannot execute it?  I was attempting to do hibiscus flowers using this tutorial from thatleanne. But yeah, it totally didn't work out.  At all.  I don't know how many times I redid this stupid mani, but I finally decided that what I came up with would just have to do.


I did a mini skittle mani on my thumb, index, and pinkie nails using China Glaze Hawaiian Punch, Zoya Yana, and Zoya Myrta.  Then, I painted two accent nails with Cult Nails Tempest and added my dotted on flowers using Hawaiian Punch and Yana. I used Zoya Myrta to create the pistil, but, as you can see, they were way too thick.


I'm sure I'll eventually get to a review of the three polishes I haven't reviewed yet, but I'll give a quick and dirty blurb about each polish just in case you're curious.


Hawaiian Punch is a gorgeous vibrant red with flashes of pink making it lean more towards a hot pink.  Application was easy, no clumping, pooling, streaking, or dragging.  I used three coats.


Yana is a gorgeous corally pink that actually WORKED on me!  I don't typically do well with Zoya cremes. They either streak like mad or refuse to dry, but Yana was perfect.  Application was super simple and required almost no cleanup.  This is three coats.


Tempest is a gorgeous white that achieves opacity in one thick coat or two coats if you're striving to keep bubbles and shrinkage to a minimum.  Application is a little more tricky than the other two.  If you want opacity with one coat, you have to do three quick swipes without going over parts that have already been painted, otherwise you'll get bald spots.  This is one thick coat and one thin coat.


You can read my review of Myrta here.  It's the old format, but I think you get the idea.  I used two coats because I nicked it a little and wanted to make sure I covered that bit up.


Lastly, I tried out a new quick dry topcoat last night, and it left me with mixed feelings...  Nubar Diamont isn't as thick as Seche Vite or HKGirl, and it doesn't have the same strong smell, either.  It dries super fast and really hard like SV but without the shrinkage and bubbles SV is known for, which is what I've been looking for.  However, it didn't dry shiny.  Take a look up there at my macros of Hawaiian Punch and Yana.  Go ahead.  I'll wait.  Yeah, those would be brush strokes.  Ugh.  I'm not sure if it's just that Diamont doesn't play well with Zoya and China Glaze, or if maybe I allowed the brush to touch the paint, which was mostly dry at that point, and it mixed the paint with the topper?  I'm not sure.  It also smeared the art a little even though I waited  a good 10-15 minutes after painting them to add the topcoat.  So yeah, I'm still going to experiment with Diamont, but I'm a little disappointed with the outcome as of right now.  I received this little baby from a friend who has a huge refill bottle.  I've always wanted to try it out, but I didn't want to commit to a full size bottle in case I hated it.

You can purchase Zoyas at salons or beauty supply shops like Ulta.  You can purchase Cult Nails at their online store here.


What's your favorite summer flower?

Saturday, June 8, 2013

ECOPOLO Summer Mani Challenge

Better late than never, I say!  Tonight's special post is for a challenge I have accepted through one of my polish groups.  Here is the list of the weekly challenges:


I'm really no good at nail art, but I thought I'd think outside of the box for this one.  I could've done something that was well within my comfort level, like a yellow mani with polka dots, but I had this ridiculous idea immediately pop into my mind.  And because I don't usually want to do nail art, I thought I had to give it a shot, at least!  So, tonight's attempt at nail art is a beach scene at sunset with an abandoned yellow polka dot bikini.  I've also included a palm tree and an umbrella.  Sorry if it's hard to tell what I attempted, but I thought I'd post it anyway despite it not being the best job.  Also, note that I'm showing you my right hand.  For some reason, it came out better than my left hand, which is weird because I'm a righty.


I used a ridiculous amount of polishes to create this look: OPI WWTC, Czechbook, Jinx, The Spy Who Loved Me, You Don't Know Jacques, Opening Night Gold; Girly Bits Arctic Sunrise, Glo Worm, Banana Hammock, and Jelly Shoes; Revlon Powder Puff; Barry M Indigo, Max Factor Fantasy Fire; Zoya Yana; and Color Club Almost Famous.


First, I striped on Czechbook, Opening Night Gold, and Arctic Sunrise.  I let it dry for a minute, then, I sponged on Banana Hammock, Jinx, The Spy Who Loved Me, Jelly Shoes, Indigo, and Fantasy Fire to create a sunset look.  Next, I painted on the sun, bikini, trees, and umbrella.


Then, I finished up with sponging on WWTC and Powder Puff onto Czechbook and Opening Night Gold to create a wave crashing on the ocean look.  Lastly, I added KBShimmer's Clearly on Top, which smeared the details just a tad, but not horribly.  Here are macros of each finger.  You'll need to click on it to enlarge if you want to see the details a little better.


There you have it!  My take on the Yellow Polka Dot Bikini!


So, was this a nail fail, or do you like it?

*I was not financially compensated for this post.  All items in this review were purchased by me for my own use.  The opinions are completely my own based on my experience.  For more information, please see my Disclosure Policy in the tab above.*
Tuesday, April 23, 2013

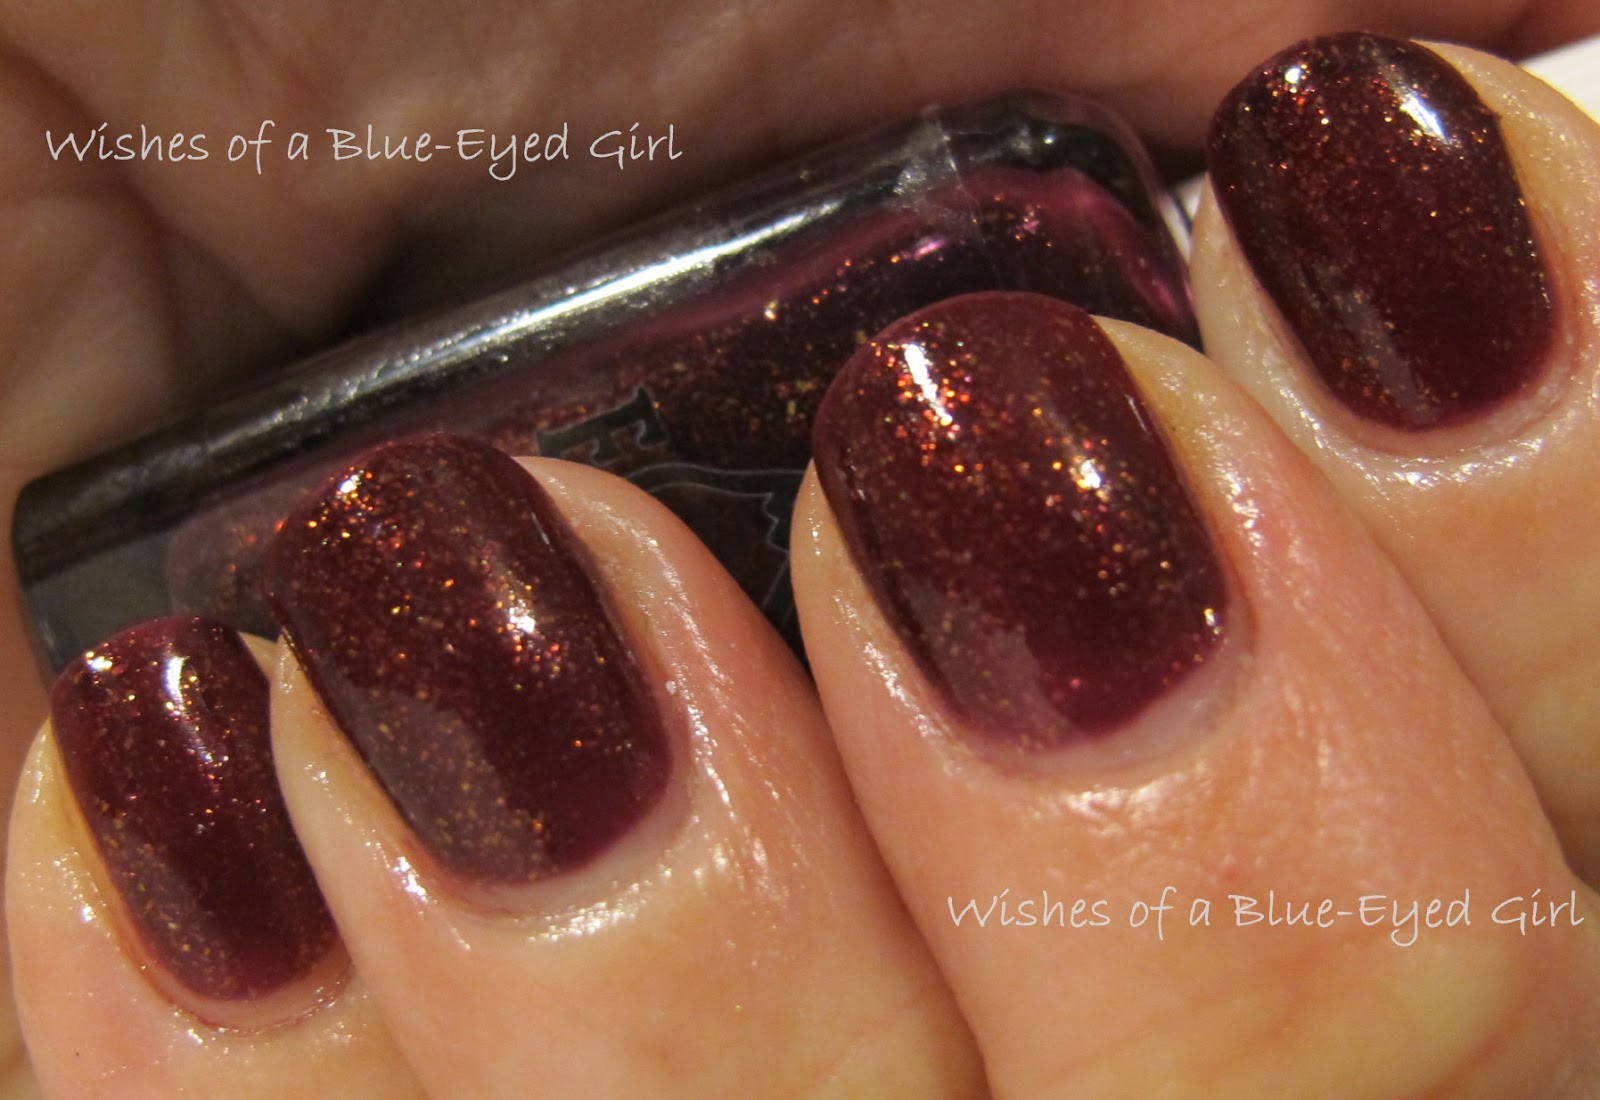
Elevation Toubkal

I'll let Lulu of Elevation Polish describe the inspiration for tonight's polish: "Part of the Morocco Collection. Toubkal has one of the most amazing summits. The view from the top is nothing short of spectacular. You can see for miles and miles but I got fixated on the valleys below and how all that green short grasses mixed with shadowing looks like it was glowing and shining purple."

Let's take a look see, shall we?


*I was not financially compensated for this post.  All items in this review were purchased by me for my own use.  The opinions are completely my own based on my experience.  For more information, please see my Disclosure Policy in the tab above.*

Color: Deep blood red with gold, red, and pink flecks


Finish: Glitter Jelly – glitter in a colored jelly base.  This isn't strictly a glitter, but this is about as close to a strict definition as I can get.  It's not quite a shimmer, but the particles, to me, are more like a glass fleck than a glitter.  It's in a crelly base that is less transparent than a jelly, but the flecks still shine through.
Bottle / Brush: Rectangle bottle – ribbed cap that is a little hard on the hands to open if you have sensitive skin.  The wand is the standard length, but the brush is a little too thin to pick up large / shaped glitter without fishing.  The brush's width is also an issue for spreading.  It doesn't fan out and pretty much requires you to dab polishes that are densely packed with glitter, but that's not really an issue with this polish.


Opacity: Medium – achieves opacity at four coats.
Glitter Application: Easy – Spreads evenly without much manipulation.  Just because the glitter spreads well, however, doesn't mean that the polish does...  See Overall Ease of Application.
Consistency: Thick – thick and can be clumpy, but is somewhat remedied with some polish thinner.


Overall Ease of Application:  Impossible – It's so thick that it’s almost impossible to spread.  Clumps from the thickness.  Also, because of the thickness, it will almost always shrink once you add a quick dry topcoat.  The first three layers were a streaky mess that wouldn't spread evenly, but the last layer finally evened it all out.
Stampability: Not designed for stamping.


Dry Time: Long – dry to the touch with minimal smudging in over 8 minutes. Overall Thoughts:  I love me some Elevation polishes, and I really wanted to love Toubkal.  The color is gorgeous.  The shimmer is beautiful.  The richness and depth are divine!  HOWEVER, the application was a nightmare.  I haven't reapplied it since my first try, but you can see how much is missing from the bottle.  I used ALL of that for this mani.  That is INSANITY.  The first three layers were a streaky mess that clumped and wouldn't spread.  The fourth layer finally evened the color out, but it was a bit thick.  I added a little thinner, but it didn't really help.  I'm planning to add more thinner and try again because I really want to love this polish.  I'll definitely keep you guys posted on my second try with this bad boy.  It works great as undies to one of my all time favorite glitters, which I'll show you tomorrow!

You can purchase Elevation Polishes at Lulu's store.  Follow her blog for info on restocks and new additions to her line.

What polish did you really want to love but came away let down after you tried it?

Monday, April 8, 2013

I'm Back!!!


Sorta.  Hopefully.  We'll see.  The evil project of death, doom, and destruction is still going on, but I think I'll now have a little bit of time to blog again!  Hoooooooray!!!!!  Tonight, we're going to look at the much sought after Hare Burry the Hatchetfish.


*I was not financially compensated for this post.  All items in this review were purchased by me for my own use.  The opinions are completely my own based on my experience.  For more information, please see my Disclosure Policy in the tab above.*


Color: Neutral/tan with blue, green, and pink iridescent glitters.
Finish: Glitter Jelly – glitter in a colored jelly base.


Bottle / Brush: Round bottle brush (i.e. Seche Vite) – standard width and length.  Easy to control and manipulate.
Opacity: Medium – achieves opacity at three to four thick coats.


Glitter Application: Medium – requires the dab method, but spreads evenly.
Consistency: Super thick – no amount of polish thinner will help this polish.  It is extremely thick and clumpy.  Has a snot like consistency.  Sometimes, these types of polishes require you to use a bunch of polish on your brush in order to get the polish on your nail at all.  Then, it’s just a thick clump on your nail that will bubble.


Overall Ease of Application: Impossible – Is so thick that it’s almost impossible to spread.  Clumps from the thickness.  Develops bubbles because it is so thick.  Looks almost like you have on six layers when you only have on three.  Also, because of the thickness, it will almost always shrink once you add a quick dry topcoat.
Stampability: Not designed for stamping.


Dry Time: Long – dry to the touch with minimal smudging in over 8 minutes.Overall Thoughts: I really wanted to love this polish.  So many people were all about it, so I thought I'd grab one to give it a shot.  Yeah.  Bad idea.  While it looks nice, it was a massive pain to apply.  It was already thick when I opened it, so I added some thinner and let it sit.  It was still pretty difficult to apply after thinner.  After the first coat, it was clumping up around the lip of the bottle.  That transferred onto the nail in clumps that were difficult to spread.  As you can see, the polish is built up on my nail in a pretty unattractive way.  I hate that this polish was such a pain.  I'm planning to give it another shot at some point, but I'm not sure if I'll ultimately keep it.  Sorry I'm coming back with a negative review!  Tomorrow will be good, I promise!

You can purchase Hare at her store and on Llarowe.  Follow Hare on Facebook.

Do you have a polish that is so thick that you just can't wear it?

Tuesday, January 29, 2013

Oldie but Meh-y: Crows Toes Kat Nip

Holy crap, guys!  O.o  I've almost hit 900 blog followers.  That is AMAZING and far beyond what I ever thought would happen when I first started my little blog.  Thank you for being here!  <3  Feel free to send me suggestions and requests, and I'll do my best to incorporate what I can.  In other news, I have an appointment with an allergist tomorrow.  I'm pretty sure I've been dealing with an allergy issue for the past month, or maybe even longer, so I'm actually looking forward to being poked and prodded tomorrow.  Sorta.  Anyway, because I've been feeling a bit under the weather, I'm hauling out some pre-edited photos, which were taken during my first big stash slash last summer.  Basically, that means that you're going to see photos that aren't that great in quality, have some severe nubbins and not so great cuticles, and truncated reviews due to a lack of proper photos.  If you can bear with me the rest of this week, I promise you'll be glad you did.  Next week, I'm really looking forward to showing you some gorgeous polishes - both indie and mainstream.  Anyway, let's get to the polish for tonight!

Tonight, I'm going to show you Crows Toes Kat Nip.  Kat Nip is a green and gold glitter bomb with glitters all the same size (around .008 or .15).


It's a super sparkly glitter bomb, but way too thick for my taste.  It was so hard to apply for me.  It was clumpy and junked up the opening of my bottle after every brush dip back into the bottle.  Plus, it was so ridiculously topcoat hungry that it required two coats of Seche Vite, which shrank something fierce.  Lastly, it chipped relatively quickly.  Granted, I didn't do my normal wear test on this guy, so I can't really comment on how long it would wear under normal conditions (with Bonder basecoat and non-quick dry topcoat).


Check out the macro.  Can you tell how clumpy it is?


While this polish is a pain in the butt to apply, it is quite pretty.  I imagine that it would be even prettier as one coat over colored undies, but I didn't get any pictures of that.  Further, I'm sure that it would apply more easily with thinner, but again, I didn't test that.

Kat Nip is an exclusive shade made for Overall Beauty, and it's currently on sale!

Do you have Kat Nip?  Do you like it?  What's your favorite way to wear it?

Wednesday, September 19, 2012

Special announcement!! Plus, another older mani!

As I mentioned on Facebook and Twitter this morning, I'm contemplating doing a reader of the month like a few other bloggers have done. Basically, if you interact with me on the blog, my twitter, or facebook, you will be entered into a random drawing to win a prize at the end of the month for EACH interaction. The bottom line is that I'd love to hear from everyone, and I think this is a good way to get everyone involved.  The prizes will be pretty good, too, and will be the winner's choice of nail art supplies, an indie polish, a mainstream polish, or a few drugstore polishes. :) What do you guys think?  I'd love your feedback!

Now, onto the polish!  Today is another oldie but, sadly, a not-so-goodie: Pretty & Polished Bubble Tea.  For some reason, I just didn't like this polish on me.  I'm not sure if it was the color that just didn't look good with my skin-tone or what.  I also thought there would be far fewer black glitters than what it actually came with.  Either way, I decided I didn't want to keep it and sold it a few months ago.


Bubble tea is a bright spring green with smallish black hexes and micro-translucent white hexes.  The micro hexes catch the light just right and gives the polish more depth.


This is 3 coats, but it was thick so I used quite a bit for just one mani.  The hexes spread easily, though, so it was pretty low maintenance other than the thickness.


The close-up is pretty, though.  It just, I don't know.  It just wasn't me.  What do you think?


Pardon the errant hair up there...  I'm pretty sure it's of the feline variety.

As always, you can purchase Pretty & Polished on her Etsy store and on Llarowe.  Follow her on Twitter and Facebook for updates!


Are there any colors that you just don't like without any real reason?