Wednesday, September 12, 2012

Jelly Sandwich: KBShimmer Elle

You guys asked for it, so I'm delivering - a jelly sandwich!  KBShimmer's Elle and OPI My Pointe Exactly.


OPI My Pointe Exactly is a grey jelly that is from OPI's NY Ballet collection that came out this summer.  KBShimmer's Elle is a grey jelly based polish with large pink hexes, large grey hexes, medium matte pink hexes, white squares, white hexes, and silver holo hexes.  It layers up nicely on its own, but I really wanted to try out a jelly sandwich with these two.  They complimented each other perfectly!

The best way I can describe to do a jelly sandwich is to put down one coat of your jelly base coat, top it with a coat of your glitter, and alternate until you get the look you're after.  Here, I did a coat of My Pointe Exactly, a coat of Elle, another coat of My Pointe Exactly, one more of Elle, and finally finished it off with a last coat of My Pointe Exactly.

Isn't it pretty???

Check out this closeup shot.  It looks like the glitters are just floating in space.  It's so cool!!


My Pointe Exactly is a typical jelly.  By itself, it has very light coverage with lots of visible nail line.  If you're ok with VNL, then it would be a gorgeous light grey for you.  I, however, don't really fancy VNL.  In fact, it kinda drives me crazy, which is why doing a jelly sandwich was a perfect use for My Pointe Exactly.  Unfortunately, My Pointe Exactly has been discontinued, but I saw a few at my local Kroger.  I'm sure you can also still find some at Ulta.  

KBShimmer Elle spread easily without streaking or much manipulation on my part.  It really is a great polish.  I only have 2 KBShimmers, but so far I really like them!  I received my bottle in a swap, but you can purchase them from Christy at her store here.  You can also follow her on Facebook and Twitter for news and updates.

What's your favorite jelly sandwich combination?

Tuesday, September 11, 2012

Game Day Nails: Nail Art and Endless Static Sea

I'm going to make this a quick one tonight as I'm trying to spend some quality time with the hubs and kitties before I go back to work tomorrow.  It was a nice week and a half off, and I'm sad to go back now that the basement is finally unflooded!  Although, the mold and mildew are making my eczema flair like you wouldn't believe.  It's pretty bad.  I apologize for the dry and ugly cuticles...  Even balm and oil aren't helping much.  Ugh.

Updates: only 18 follows away from that awesome giveaway I keep harping on about!  Also, I updated my blog sale with more polishes (indies, HTF's, etc) and lowered prices.  Please help a gal out and purchase a few!  I'd love ya forever!

On to the nails.  My game-day nails from this past weekend included a base of ProGel Deep Abyss with nail art on my thumbs using OPI OPI Red and Revlon Metallic.  Then, I finished off the rest of my nails with Pahlish Endless Static Sea.


I didn't use Gelous over the nail art, so it smeared a little when I applied my Seche Vite.  It's weird, too, because I let it dry for quite some time before I applied my top coat.  Oh, well, I still like how it came out despite the smearing.


Pahlish Endless Static Sea is a black jelly based polish with holo hexes, bars, and squares as well as pink and blue shimmers.  The pink and blue shimmers were actually a surprise because I couldn't see them in the bottle at all!


See, the bottle just looks like a normal black jelly with awesome holo glitters.  Right?

But, when I put this guy on, it was like magic!  I honestly wasn't sure if I would keep ESS before I wore it, but now that I have, there's no way I'll give this guy up unless I absolutely have to.  Look at it on the nail.  The glitters just glow!


Plus, here's a closeup of that pink and blue shimmer I was talking about.  It was such a fantastic surprise!  


Also, look at how shimmery ESS is.  It's absolutely amazing.  I wore this polish for days, which isn't like me at all.  (I get bored easily.)  


You can buy Pahlish at her Etsy store every Friday night and on Llarowe.  You can also follow Shannon on her Facebook page for news and updates.

As a random aside...  Every time I see ESS, I think of this horrible (amazing?) movie I saw in high school called Johnny Dangerously.  Has anyone else seen this??  Warning, this isn't rated G.  It isn't really rated R, either, but it's definitely NSFW.  

Specifically, this is what I envision:


Hah!  Now that I've chuckled like an idiot for a few minutes, I think I'll call it a night.  

Have you ever had a polish that surprised you when you put it on your nail?  If yes, which polish and why?

Monday, September 10, 2012

Spank You Very Much!!!

Firstly, we're only 21 followers away from this kick a$$ giveaway:


Spread the word to your nail polish loving friends so I can get this giveaway going!  Who knows, if we get there quickly, I may throw in a surprise second prize!

Now, on to today's post!  Remember a few weeks ago when I tried out wearing gels as a basecoat for my various glitter toppers?  And it was a major disaster because I totally ravaged the gel with acetone???  You remember that?!  Ok, well, I tried again.  This time it has been MUCH more successful!  I decided to use ProGel Deep Abyss again since I have so many polishes that would look great layered over black.  One such polish is Dollish Polish's Spank You Very Much.  (Check out my comparison post from two weeks ago that included SYVM.)  I finally got around to wearing it on its own this past weekend, and I seriously love it.


SPYVM is made up of fine green and teal hexes, medium purple hexes, and larger teal hexes in a clear base.  Since I was going for a less busy look, I did a very light application.  It applied very easily spreading out without much work on my part.


Check out the closeup.  Isn't this gorgeous?!

Finally, no bubbles!  Hallelujah!

It's also very sparkly.  The fine green hexes are holo, so they throw out a rainbow of colors in different lighting.  Here's an intentionally blurry pic so you can see the sparkle.


Since I wore this over gels, it was a tad difficult to remove.  Glitter + non-acetone remover = major issues.  However, I found a little felt, cut it up into squares, soaked it in non-acetone remover, and bam!  No more glitter!  Normally, if I'm wearing glitter on my nails I'll soak them in acetone to help with removal.  Obviously, that's not really possible with gels on, so the felt option was the next best thing.

Verdict: I <3 Spank You Very Much.  It's a gorgeous glitter polish, and the flashes of purple really make this polish stand out from the others.  Definitely keeping this guy.

You can purchase Dollish Polishes at her store here or on Llarowe or Overall Beauty.  Currently, Dolly doesn't have plans to restock SYVM in her store, but it is available on Llarowe.

On a more serious note, today is World Suicide Prevention Day.  More people than you may realize are suffering from depression and suicidal thoughts.  If you need help or to talk to someone, reach out to friends, family, or suicide prevention centers, such as the National Counsel for Suicide Prevention.  You're not alone!    Your friends and family will not hate you or avoid you if you ask them for help.  Depression lies, don't listen to it!

Friday, September 7, 2012

Recipe Friday: Chocolate Reeses Cupcakes

Every first Friday of the month means Recipe Friday!!!  Today, I have gluten-free chocolate cupcakes with Reece's peanut butter cup centers and peanut butter frosting.  The cupcake recipe is adapted from here, and the peanut butter frosting is adapted from here.

Ingredients for Reese's filled gluten-free chocolate chocolate-chip cupcakes:


1 1/2 cups almond flour
1/4 cup unsweetened cocoa powder
1 tsp baking powder
2 eggs
1 tsp vanilla extract
1/4 cup grape seed oil
1/4 cup almond milk
2 tbsp agave nectar
3/4 cup dark chocolate chips
1 doz Reese's Peanut Butter Cups


Preheat the oven to 350*.  Line 12 cups with your cupcake liner of choice.


I use a muffin tin with little posts to make it easier to add fillings.  If you don't have a tin like this, you can fill your cup halfway with batter, place the Reese's and then finish filling the rest of the cup.  If you do have a tin like mine, go ahead and put your Reese's on the posts.  Alternatively, you can also wait and add the Reese's after the cupcakes come out of the oven.


In a large bowl, combine the almond flour, cocoa powder, and baking powder.  Mix together.


Add the eggs, oil, milk, agave, and vanilla.


Now, mix well with a hand-mixer.  Don't over-mix or they won't be very fluffy!


Add your chocolate chips and fold into the batter with a spatula.


Spoon into your cupcake tin.  As I mentioned before, if you don't have a tin with posts, add half of your batter, place the Reese's, and finish filling the cup.


Bake for 14-17 minutes until a toothpick comes out with only a few moist crumbs.  *Note: remember that you have candy in the middle, so don't poke it in the middle when you test them.*


Ingredients for no-sugar added peanut butter frosting:


1/2 cup creamy peanut butter
1 packet of stevia
Splash of almond milk (I usually use unsweetened, but was limited to Vanilla at the time of this post)

Put the peanut butter into a bowl and fluff with a hand-mixer.  


Add a splash of almond milk until you get to your desired consistency.  The more milk you add, the less fluffy it will be.  After you mix the milk, add the stevia and mix again.  

**This is not a very smooth frosting because it doesn't use any powdered sugar.  If you're looking for something with a smoother finish, you'll need to use something like this recipe, which is also tasty.  I used a no-sugar added recipe as my husband and I are avoiding cane sugar.**

Put it in a piping bag and pipe!  If you don't have a piping bag you can use a ziplock bag with the corner snipped off.


Chop Reese's into halves.  


Top your cupcakes with the Reese's halves.  Since the Reese's stuck to their wrappers a bit, they looked like little mouths.  I decided to make the frosting look like fur so I could make little monsters.  I added some chocolate chips for eyes and got a really cute little monster.  I used Wilton 195 to make the frosting look like fur.  


On 8 of the cupcakes, I did not use a tip at all to show you what you can do if you don't have a piping tip.

My sister was trying to snag one while I wasn't really paying attention, lol!

And that's it!  I made these for my dad's birthday / my parents 40th wedding anniversary, and they were a huge hit.  I hope you guys try it!  If you do, let me know what you think.


What's your favorite cupcake flavor?


Thursday, September 6, 2012

Comparison Thursday: Red, Black and Silver Glitters

As you may remember from yesterday's post, my basement is still flooded, and I'm still trying to bail it out.  We bought a new sump pump, which seems to finally be doing the trick.  The main issue will be going through the entire basement, which is our storage, to clean up and throw stuff away.  Plus, we're talking about waterproofing the basement and tearing out all of the walls/wood to make sure we aren't breeding mold.  It's going to be long, hard, and crazy expensive, which means I'm on a non-goal related polish no-buy indefinitely.  Although, I will say that I plan to purchase the entire Dollish This Is Halloween collection plus polishes that are tied to personal goals.  So, wish me luck as I try to put on my blinders to such things as the Pretty and Polished and Elevation restocks!!!!  Eeeep!

Ok, on to the topic at hand: Comparison Thursday!!!!  Let's take a look at Nostalgic Wrath and Dollish Polish Team Salvatore.  

 Wrath on thumb and pinkie, Team Salvatore on middle finger.

Here are the bottle shots:

Dollish Team Salvatore 


Nostalgic Wrath

Both are red, black, and silver.  Wrath has gunmetal as compared to Team Salvatore's legit silver.  Wrath is a little less busy, and Team Salvatore is very dense.  Both have red and black hexes and squares.  Team Salvatore has silver medium and fine hexes, and Wrath has large and fine gunmetal hexes.  


(As an aside, I apologize for the bubbles, blurriness, and terrible skin.  Bubbles and blurriness are user error.  Terrible skin is from my latest most awesome eczema flair-up.  Blarg.  I hate allergies!!!)

I asked the husband which I should keep, and he asked me why I couldn't keep them both...  I think that's a valid questions, lol.  Granted, I should've expected him to like them both since they are Georgia Bulldog colors.  

Nostalgic Wrath has been discontinued, but you can purchase her other polishes here.  Dollish Team Salvatore is still available in mini size here or in full size here.

Do you have another red, black, and silver glitter that would compare well with Team Salvatore or Wrath?  Out of these two polishes, which one would you keep?

Wednesday, September 5, 2012

Game-Day Nails!

Man, today has been INSANE!!!!!  I had the day off today, which would've been awesome, except I had to deal with some pretty crappy stuff today.  As I was walking to the basement to do laundry, I noticed that we had almost 2 inches of water at the bottom of the stairs.  Needless to say, the hubs and I have been bailing water out of the basement for HOURS today.  We finally called it quits when we heard the coyotes howling nearby.  I live in the suburbs of Atlanta.  We have coyotes.  Don't even ask me when or how that happened. Anyway, I'm going to make this a quick picture bomb since I'll be getting into a proper review of most of these polishes later.  Gooooooooooo Dawgs!!!!!!!!!!!!!!


Basecoats: OPI OPI Red, China Glaze Stone Cold, and Sally Hansen White On

I will say that China Glaze Stone Cold was the biggest pain in the butt to deal with.  It dries matte, so it dries super fast.  Plus, it's pretty thick, so you really have to work quickly to avoid dragging and clumping.  I added a little thinner, which helped a ton.  It's definitely one of those polishes that you really need to use three swipes max.  Also, it stains and is nearly impossible to clean up.  Unfortunately, I brought a remover that wasn't my usual favorite.  Typically, I use a straight-up acetone without any nutrients, but I wanted to bring a smaller bottle I had on hand.  Clean-up was IMPOSSIBLE.  I have pics of my right hand with Stone Cold all over my middle finger because I couldn't get it all cleaned up.  OPI Red has been my go-to red for years.  I've had it for forever (so it's a black label), and it applies really really well.  I probably only needed one coat, but I'm weird and went for two.  No staining during removal, which is key for the perfect red.  Sally Hansen White On is my favorite white because it doesn't streak and goes on in two coats.


I topped this mani with Nostalgic Nail Lacquer Wrath (discontinued), Dollish Greased Lightening, Pretty & Polished Swing (discontinued), and Dollish Team Salvatore.  Tomorrow (today?), I'll have a Comparison Thursday on Wrath and Team Salvatore, so check back for that!


Here are some closeup bottle shots:


Greased Lightening


Team Salvatore

Swing

Wrath


I really liked the way this came out.  Very spirited, don't you think?  :)


You can purchase Nostalgic Nail Lacquer here and here and follow Erin on facebook or twitter for news and updates.  You can purchase Pretty & Polished here and here and follow Chels on facebook or twitter for news and updates.  Lastly, you can purchase Dollish here or here and follow Dolly on facebook or twitter for news and updates.

Do you support a college or pro football team?  If yes, which polishes are your favorite game-day polishes?

Monday, September 3, 2012

Nail Fail: Sonnetarium Edition

I'm still at the beach celebrating my parents' 40th wedding anniversary, but I did have some time to paint my nails.  I say this is a nail fail because I was in such a rush that my Seche Vite got the better of me.  This weekend, I did game-day nails, but I'm saving those for Wednesday as I have a Comparison Thursday related to my game day nails ready to go for this Thursday and wanted the full mani to be fresh in your minds.

Anyway, today, I used ULTA Mint Condition, which is a minty aqua that looks to be a dupe of China Glaze For Audrey, and Sonnetarium Never Glow Up.  You can purchase Sonnetarium from Michelle's etsy store and follow her on facebook for news and updates.


Look at that gorgeous glitter!

I wasn't sure I would like wearing a Tiffany colored polish, but I'm kinda digging it.  Sadly, the ULTA polish didn't apply well at all.  It was thick and streaky leaving bald spots all over the place.  I applied a bit thicker coat than normal on my second coat to try and get better coverage without a million coats, and I think that's what got me into trouble.  If you'll look closely, you can see I have some MAJOR shrinkage as well as smudging.

I had another nail disaster, so you get my right hand again.

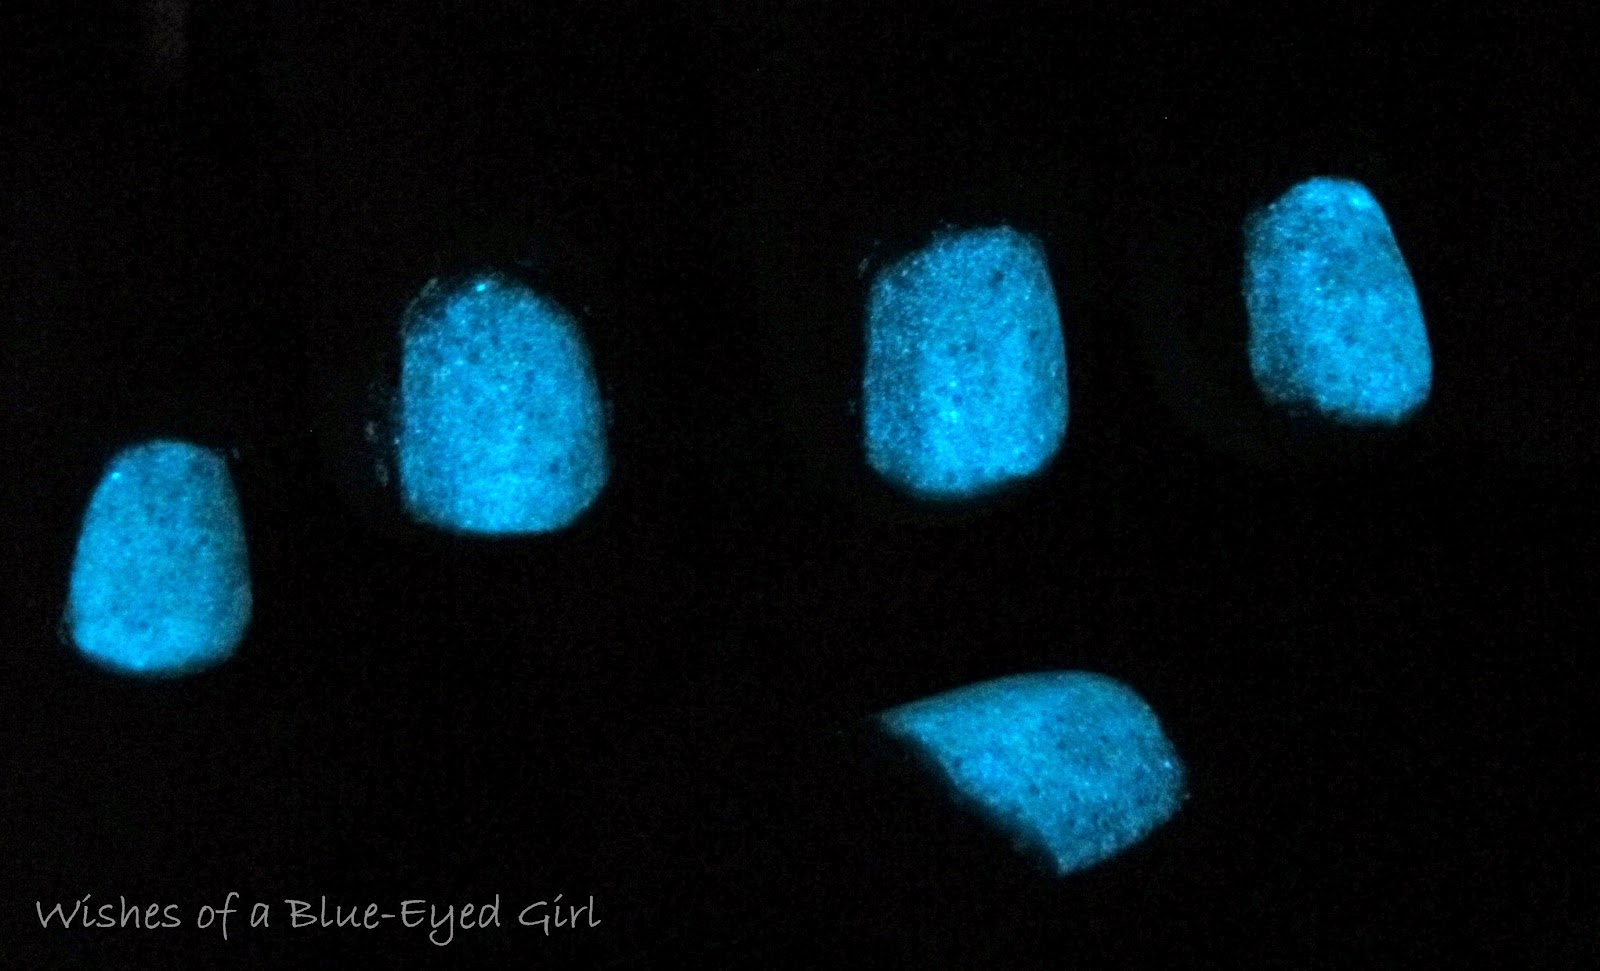
After Mint Condition, I applied Sonnetarium Never Glow Up, which is an aqua/teal glitter top coat that glows in the dark.  It also has green/red/blue/gold iridescent hexes and gold flecks.  I seriously love this polish.  Michelle warns that it dries quickly and gravelly, so you need to work quickly so it doesn't drag and apply a top coat to smooth out the consistency.  Otherwise, it's a beautiful polish.  I was so in love, I misguidedly applied two coats of Never Glow Up, which made my mani quite thick and a bit unmanageable.  Needless to say, I will only apply one coat from now on.  One of the things I love the most about this polish are the iridescent hexes.  They shimmer green, blue, gold, and red.  I seriously <3 iridescent glitters!


Another thing I really love is the glow-in-the-darkness of it!  Look how bright it is!  This is in the bathroom without any lights.  So gorgeous!


I woke up this morning to major shrinkage and slight smudging, so I tried to remedy with some touch-ups on my tips.  Now, it kinda looks funny up close.  Luckily, you can't really tell from far away, but it drives my nail-OCD mind crazy.


Also, since I'm on vacation and brought the wrong remover (acetone with nutrients... ugh!), I had the WORST time cleaning up.  You'll see worse pictures from my game-day nails, which were a serious mess.  At least these polishes are light enough to get away with some polish on my cuticles.  I was hesitant to even show these pictures, but I figure I should show you guys the fails as well as the successes.  I think I may get China Glaze For Audrey to see if the consistency is better than the ULTA, but I've definitely decided that I am not a fan of Mint Condition's application.

Since I'm still trying to work through my untrieds, I have decided to extend Low-buy Untried August into Low-buy Untried September.  Both of these polishes are untried, and I have decided to keep Never Glow Up but list Mint Condition on my sale page here.  I'll have my sale page updated by next Monday, so keep checking back for more goodies.

Anyway, I've got to get back to the family and the beach, so I bid you all adieu for today.  Hope you all have a happy and safe Labor Day if you celebrate it!

What was your most disappointing nail fail?