Thursday, May 2, 2013

Comparison Thursday: Lilac Holos

Tonight's Comparison Thursday will be a little disjointed, and I apologize for that.  Originally, the only two lilac holos I owned were A-England Princess Tears and Color Club Fashion Addict, so I had planned to do this post a very long time ago with just those two polishes.  I'm really glad I waited, though, because I was able to add three other polishes to the line-up.  However, I didn't have all of these beauties at the same time, so the line-up photos will be a little off as I had sold Fashion Addict before I did the final comparison swatches.  Womp womp!  Anyway, let's get to it!

The players: Color Club Cloud Nine, A-England Princess Tears, OPI DS Diamond, China Glaze Visit me in Prism, and Color Club Fashion Addict


Cloud Nine


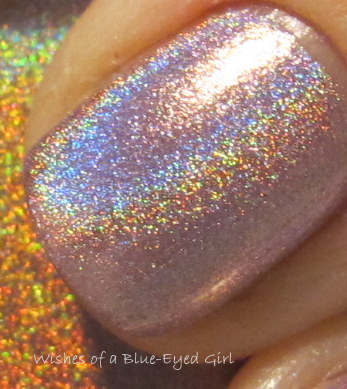
Well.  I think we should address the massive elephant in the room first.  There's clearly one obvious winner in this bunch - Cloud Nine.  Let's tackle it head on, and then maybe we can take a look at the others that pale in comparison to this amazing work of art.  The linear holo is so bright in Cloud Nine that it's blinding.  The rainbow effect is so strong that the polish almost looks like it has a foil effect to it.  Unfortunately, application was a bit more tricky than some of the others.  You have to work quickly with application to keep it from balding and dragging.  Further, it definitely shows every. single. imperfection. in your nail, so buff it with a shine block or use an aqua base before you apply.  Excuse my smudge!  I purchased my Color Club Halo Hues on Amazon.com.


Princess Tears


Princess Tears is unique to the bunch because it has a very pretty lilac to pink shimmer on top of the holo effect.  Application for all of the A-Englands I've tried has been amazing, and Princess Tears is no exception.  The only down side is that the holo isn't nearly as strong as other holos I own, especially when it's put right next to Cloud Nine.  It's almost unfair to poor pretty Princess Tears...  I purchased my A-Englands on Llarowe.


DS Diamond


I'm not going to lie.  I was extremely disappointed with this DS, which, I guess, is because I'm used to the linear beauties from the older DS line.  Sadly, Diamond was a scattered holo that wasn't even really all that holo.  It's like it wanted to be holo, but it fell short.  Application was a bit difficult because it had the tendency to flood the cuticles.  Since Diamond has been discontinued, I found mine while I was out dusty hunting at a salon.


Visit me in Prism


Visit me in Prism was another dusty find, but I've got to say that I liked it way more than Diamond!  Application was easy but a little watery.  This is four thin coats, and I had to be a little careful with application to make sure I wouldn't flood my cuticles.  Prism is a scattered holo, but the colors refract the light perfectly, and it's probably my second favorite next to Cloud Nine!  Again, since this polish has been discontinued, you'll need to check your local salons to see if they have any they'd be willing to sell.


Fashion Addict


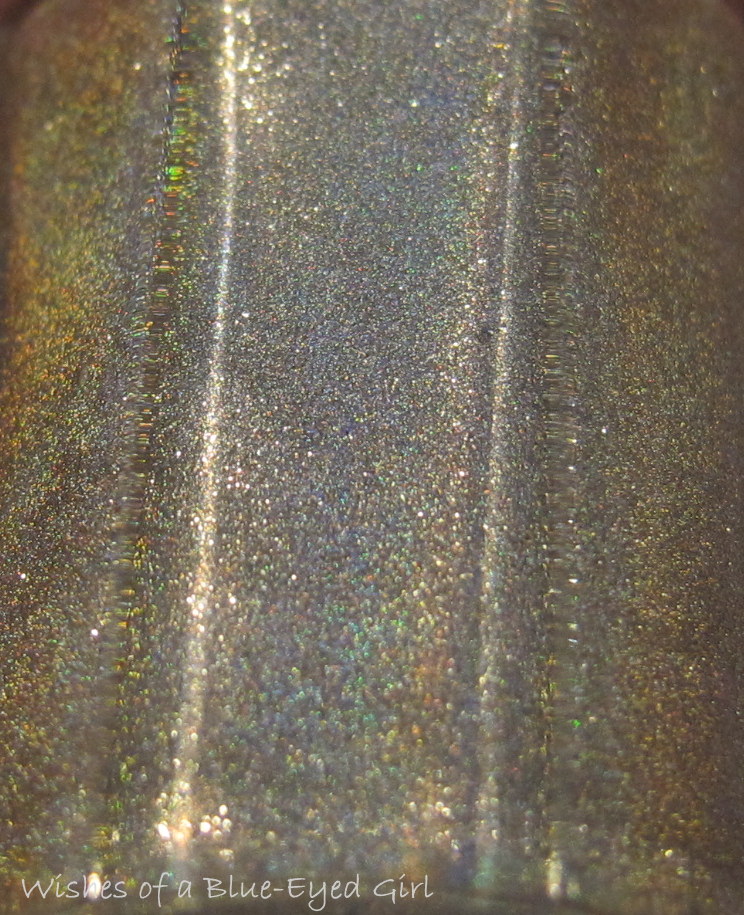
Fashion Addict is another scattered holo that shows up alright in the sun.  It's a little lighter than the rest and its rainbow effect is middle of the range.  Sadly, it's another polish that will show every imperfection on your nail.  Case in point, my index finger.  Ugh.  It also flooded my cuticles pretty easily.  You can purchase Fashion Addict where core Color Club colors are sold.  I believe I saw a few at my Bed Bath and Beyond the last time I was in there.


So, there you have it!  My pick from this bunch is obviously Cloud Nine.  How could it not be?  But each one of these polishes has its own unique positive points.  I will say, though, that you really don't need all of them if you're looking to de-dupe or destash.  Although, these are all really good for collecting if you're looking to keep collections together.  I ended up selling all but Cloud Nine, but that's because I'm moving.  

Which is your favorite?

Tuesday, April 30, 2013

A Pirate's Life for MEEEEEE!!!!!!!!

I've been to Disney World a bajillion times in my life.  The one ride my family would always insist we ride every single trip was Pirates of the Caribbean.  We knew all of the words to the song, we knew exactly where the canon fire would land, and we knew every creepy animatronic character there was.  So, of course, when the movie came out my entire family had to go see it with the family friends who always went to Disney with us.  I loved the first movie, so much, despite Kiera Knightley's horrible pout [She really gives Kristin Stewart a run for her money.]  


I mean, seriously.  She looks like the worst mouth breather EVER.

The rest of the movies were good, but not like the first one.  I was a little bummed when they decided to add elements of the movie to the ride, but I'm just a purist when it comes to my childhood favorites, I guess!  This story has a point, I promise.  And here it is: when I saw that Dollish Polish had created a polish called Yo-Ho, Yo-Ho, A Pirate's Life for Me, I knew I had to have it.  So stalk it I did.  


*I was not financially compensated for this post.  All items in this review were purchased by me for my own use.  The opinions are completely my own based on my experience.  For more information, please see my Disclosure Policy in the tab above.*


Color: Deep berry red jelly with gold, silver, navy, and maroon hexes.


Finish: Glitter Jelly – glitter in a colored jelly base.


Bottle / Brush: Round bottle – brush and wand are the standard width and length.  Easy to control and manipulate.
Opacity: Medium – achieves opacity at three to four coats.  This is one coat over Gelish Black Cherry Berry.


Glitter Application: Easy – Spreads evenly without much manipulation.
Consistency: Medium – applies easily and doesn’t flood the cuticles.


Overall Ease of Application: Easy – applies well without pooling, dragging, streaking, or balding.  Spreads evenly and smoothly.
Stampability: Not designed for stamping.


Dry Time: Quick – dry to the touch without smudging in under 3 minutes.  Granted, I think that's because I only used 1 coat over a gel mani, so I didn't have to wait for several coats to dry.


Overall Thoughts: The application of Yo-Ho was fabulous.  I'm not sure about multiple coats, but it was perfect over undies.  The glitters came out easily and spread well.  I'm sure if you want more glitters than what I've shown here, you'd most likely need to go with more than one coat.  I don't think it would be wise to load up the brush with a lot of glitters because that will probably cause you to flood your cuticles.  While I enjoyed the application, I'm a bit confused about the inspiration for this polish.  I don't really know why she chose the color combinations she chose.  I don't really feel like it evokes Pirates of the Caribbean.  It is a very pretty polish, though, and I'm glad I added it to my collection!

You can purchase Dollish Polishes at her store, Llarowe, and Overall Beauty.  Yo-Ho is only stocked at her store linked above.  Follow Dolly on Facebook and Twitter for news and updates.

Have you been to Disney?  What's your favorite ride?

Monday, April 29, 2013

Holo!!!!!

Let's take a sneak peek at Kelara One Man Wolf Pack, which is part of their Double Rainbow holographic polish line.


*I was not financially compensated for this post.  All items in this review were purchased by me for my own use.  The opinions are completely my own based on my experience.  For more information, please see my Disclosure Policy in the tab above.*


Color: Gun metal silvery gray holographic.


Finish: Holographic – pigment gives polish a rainbow in the sunshine.


Bottle / Brush: TKB hexagon – lid is tapered at the bottom and larger at the top, which helps with handling the brush and application.  The wand is an average length.  The brush is thin but long, so you have to make sure you don’t load up on polish on your brush otherwise it may pool up on your cuticles.


Opacity: High – opaque in two coats!
Glitter Application: N/A


Consistency: Medium – applies easily and doesn’t flood the cuticles.
Overall Ease of Application: Medium – applies well with minimal pooling, dragging, streaking, or balding.  Spreads well without much manipulation.


Stampability: Not tested for stamping.
Dry Time: Medium – dry to the touch with minimal smudging in 3-8 minutes.


Overall Thoughts:  Kelara is one of my favorite indie brands for a reason!  The consistency of One Man Wolf Pack is soooo good.  Sometimes holos are a massive pain in the butt to apply, but I can honestly say that isn't the case with any of the polishes from the Double Rainbow collection.  Wolf Pack has elements of linear and scattered holoness, which makes it really pop in the sunlight.  It definitely leans more toward gun metal silver that looks a little like stainless steel than silver.  The rainbow isn't very strong in indoor lighting, but it's still very pretty.  In the sun, though, the rainbow shines through easily.  I have used two coats here, and it's perfect!

You can purchase Kelara Lacquers at their store or Etsy.  Also, follow them on Facebook and Twitter for news and updates on new collections.

Do you own any Kelaras?  Which is your favorite?

Thursday, April 25, 2013

Comparison Thursday: Deep Purple Shimmers

Tonight's going to be a quick one...  I'm phoning it in, as it were, lol.  It's been a looooooooong day, but I didn't want to skip tonight!  Let's take a look at a comparison of deep purple/blurple shimmers: OPI Ink, Zoya Mimi, and Color Club Glitter Wonderland.


Oh, and don't ask me why I don't have macro shots...  I'm not really sure why I forgot them!

Ink


Ink is a deep blurple that leans purple in some lights and blue in others.  There is a strong pink shimmer that glows in low light.  Unfortunately, you can't really see it here...  Application is a little difficult.  It's definitely one that you have to work quickly with to ensure that you don't drag, clump, or bald.  It's a bit of a stainer, too, so be careful when you're painting and avoid getting any on your cuticles.  If you do, just use a little bit of cuticle remover once your polish is dry and scrape it off.  Or, scrape it off in the shower after your polish has had time to dry.  I purchased my Ink at a salon, but there was also one hanging out at my local grocery store for quite a while.

Mimi


Mimi is a deep purple multichrome that flashes pink and blue.  It's also a lot more sheer than I had expected with the first two coats going on a bit streaky.  It builds nicely in four coats, which is what I've used here.  It looks great alone, but it's also fantastic with a mattified glitter layered on top.  Mimi is more of a true purple than Ink, but not quite as purple as Glitter Wonderland.  I purchased Mimi on sale at Ulta a few months ago.

Glitter Wonderland


Glitter Wonderland is a pretty purple with blue and pink shimmers.  The shimmers are just as evident on the nail as it is in the bottle.  It applies well enough, but it definitely doesn't have the best application of the three. It's a bit tricky in that certain top coats can cause some serious shrinkage.  Also, it's scented, which isn't one of my favorite things.  Glitter Wonderland was a limited edition shade that came out in the Winter Affair collection this last year.  I've seen them in the sales bins at Sally's recently, so if you want this baby, definitely check there!


There you have it!  They're not really dupes or near dupes, but they were close enough for me to decide I don't need all three.  I'm trying to overcome my hoarding ways when it comes to polish, so I'm making sure I get rid of anything that is near enough that I don't really need to have more than one!

Which is your favorite?

Wednesday, April 24, 2013

Vampink!

Well, tonight we're rewatching the last episode of Doctor Donna.  So sad...  Donna Noble is totally my favorite Doctor Who companion.  Anyway, tonight I'm going to show you one of my top favorite polishes, Lynnderella Vampink!  I won't speak to the drama, but I will say that I like to buy polishes that pique my interest or that I find pretty or attractive.  That's definitely the case with Vampink!  I received a decant from a friend, but I loved it so much that I had to buy my own full sized bottle.


*I was not financially compensated for this post.  All items in this review were purchased by me for my own use.  The opinions are completely my own based on my experience.  For more information, please see my Disclosure Policy in the tab above.*


Color: A dark berry jelly base with fine berry holo glitters and black and berry squares and black hexes.
Finish: Glitter Jelly – glitter in a colored jelly base.


Bottle / Brush: This is from a mini bottle, but here's info for the normal bottle: Rectangle bottle – ribbed cap that is a little hard on the hands to open if you have sensitive skin.  The wand is the standard length, but the brush is a little too thin to pick up large / shaped glitter without fishing.  The brush's width is also an issue for spreading.  It doesn't fan out and pretty much requires you to dab polishes that are densely packed with glitter.
Opacity: Low – it requires several coats for opacity, but you'll never really get rid of visible nail line.  Here, I have one coat over Elevation Toubkal.


Glitter Application: Easy – Spreads evenly without much manipulation.  The first time I wore this, it was a massive pain to apply.  However, I think it was because it was a decant that needed a little thinner.  Once I added the thinner, application was flawless!
Consistency: Medium – applies easily and doesn’t flood the cuticles.


Overall Ease of Application: Medium – applies well with minimal pooling, dragging, streaking, or balding.  Spreads well with the dab method.
Stampability: Not designed for stamping.
Dry Time: Medium – dry to the touch with minimal smudging in 3-8 minutes.


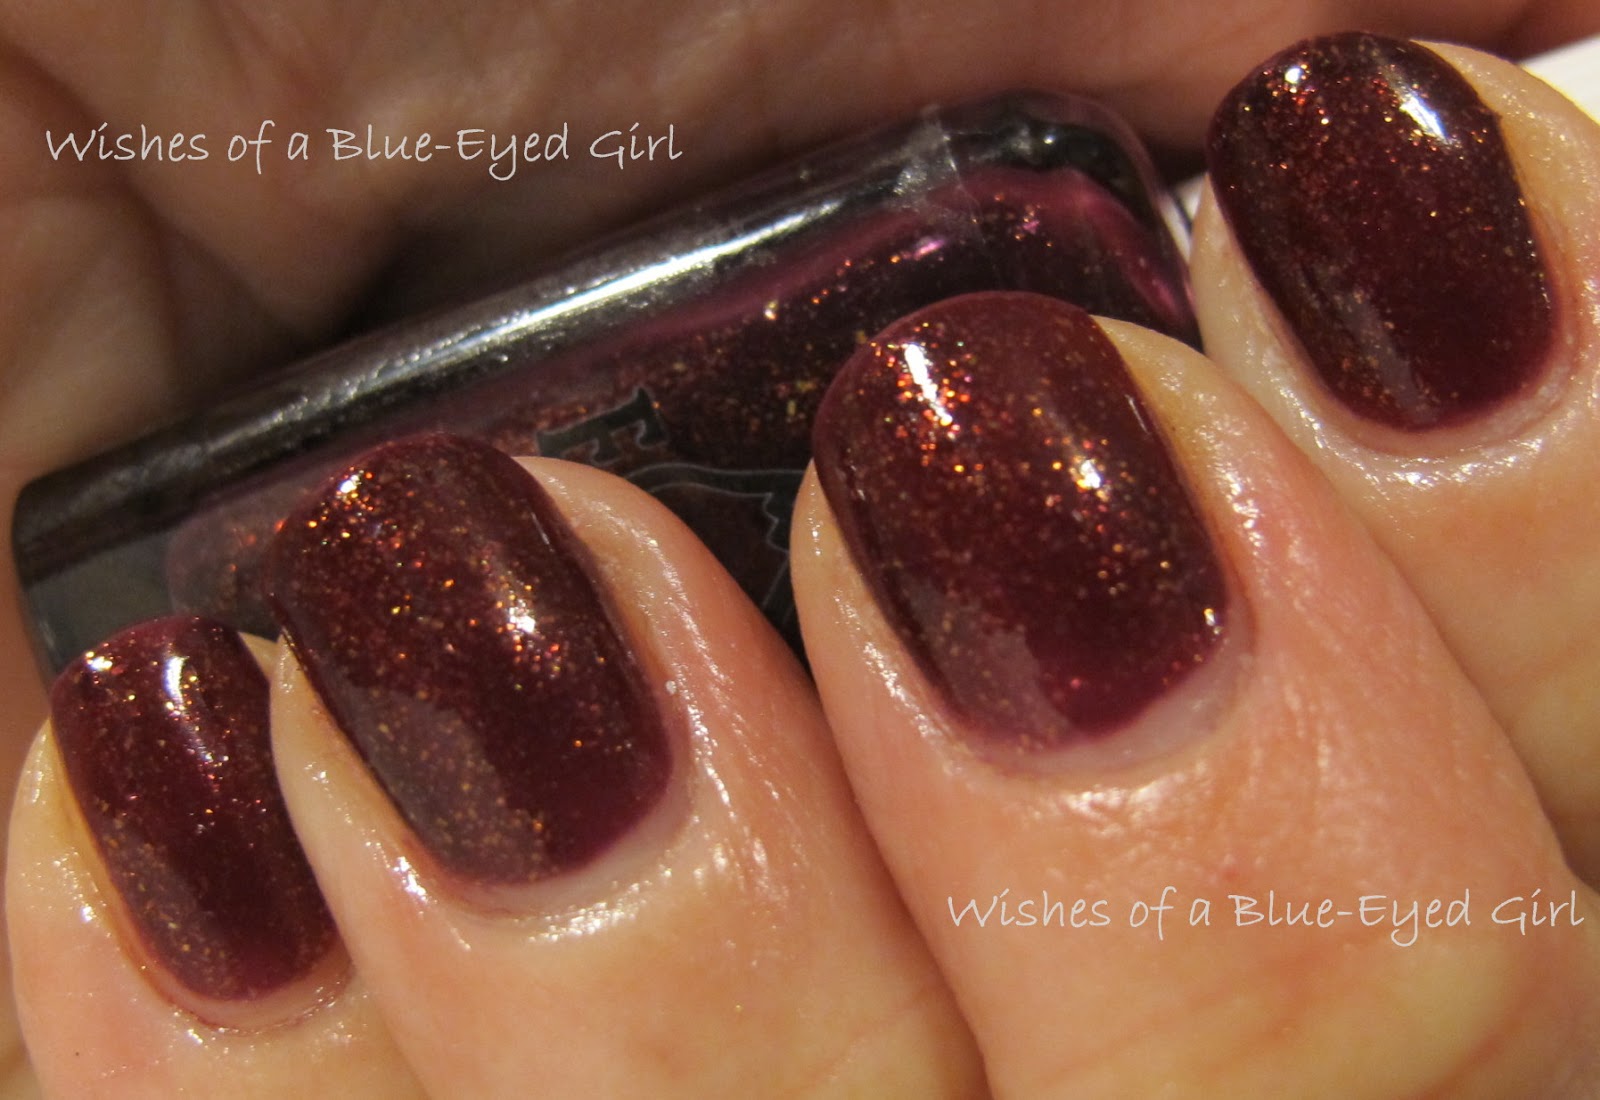
Overall Thoughts:  I love this polish.  It's a fantastic vampy glitter bomb that is blindingly shiny.  The holo glitters give depth while the squares and larger hexes provide a 3-D effect.  The glitters spread so smoothly and easily, that the dab method isn't even really necessary.  I used it anyway, but you could get a more sparse look with normal application.  I haven't tried matting it yet, but I think that could also be a fun way to wear it.  I can't really place exactly why I love Vampink, but I just really really do.  The jewel tone is so rich that I just can't help but be entranced by it.  

You can purchase Lynnderella polishes at their eBay store.  Also, go there to sign up for their newsletter!  Follow their blog, as well as their fan-run Facebook and Instagram pages for news and updates on new collections.  Also, they're hosting an amazing giveaway right now, so go check out the details here!

What's your favorite jewel-tone glitter?

Tuesday, April 23, 2013

Elevation Toubkal

I'll let Lulu of Elevation Polish describe the inspiration for tonight's polish: "Part of the Morocco Collection. Toubkal has one of the most amazing summits. The view from the top is nothing short of spectacular. You can see for miles and miles but I got fixated on the valleys below and how all that green short grasses mixed with shadowing looks like it was glowing and shining purple."

Let's take a look see, shall we?


*I was not financially compensated for this post.  All items in this review were purchased by me for my own use.  The opinions are completely my own based on my experience.  For more information, please see my Disclosure Policy in the tab above.*

Color: Deep blood red with gold, red, and pink flecks


Finish: Glitter Jelly – glitter in a colored jelly base.  This isn't strictly a glitter, but this is about as close to a strict definition as I can get.  It's not quite a shimmer, but the particles, to me, are more like a glass fleck than a glitter.  It's in a crelly base that is less transparent than a jelly, but the flecks still shine through.
Bottle / Brush: Rectangle bottle – ribbed cap that is a little hard on the hands to open if you have sensitive skin.  The wand is the standard length, but the brush is a little too thin to pick up large / shaped glitter without fishing.  The brush's width is also an issue for spreading.  It doesn't fan out and pretty much requires you to dab polishes that are densely packed with glitter, but that's not really an issue with this polish.


Opacity: Medium – achieves opacity at four coats.
Glitter Application: Easy – Spreads evenly without much manipulation.  Just because the glitter spreads well, however, doesn't mean that the polish does...  See Overall Ease of Application.
Consistency: Thick – thick and can be clumpy, but is somewhat remedied with some polish thinner.


Overall Ease of Application:  Impossible – It's so thick that it’s almost impossible to spread.  Clumps from the thickness.  Also, because of the thickness, it will almost always shrink once you add a quick dry topcoat.  The first three layers were a streaky mess that wouldn't spread evenly, but the last layer finally evened it all out.
Stampability: Not designed for stamping.


Dry Time: Long – dry to the touch with minimal smudging in over 8 minutes. Overall Thoughts:  I love me some Elevation polishes, and I really wanted to love Toubkal.  The color is gorgeous.  The shimmer is beautiful.  The richness and depth are divine!  HOWEVER, the application was a nightmare.  I haven't reapplied it since my first try, but you can see how much is missing from the bottle.  I used ALL of that for this mani.  That is INSANITY.  The first three layers were a streaky mess that clumped and wouldn't spread.  The fourth layer finally evened the color out, but it was a bit thick.  I added a little thinner, but it didn't really help.  I'm planning to add more thinner and try again because I really want to love this polish.  I'll definitely keep you guys posted on my second try with this bad boy.  It works great as undies to one of my all time favorite glitters, which I'll show you tomorrow!

You can purchase Elevation Polishes at Lulu's store.  Follow her blog for info on restocks and new additions to her line.

What polish did you really want to love but came away let down after you tried it?

Monday, April 22, 2013

Purple Sparkles!


This is going to be interesting...  Let's take a look at three different polishes tonight!  A-England Elaine, Sonoma Nail Art Sonoma Sunset, and a Polish Bar prototype that became Berry Shimmer.  I'm going to attempt to do this in as much order as I can, so I hope it doesn't get too convoluted!

*I was not financially compensated for this post.  All items in this review were purchased by me or swapped for by me for my own use.  The opinions are completely my own based on my experience.  For more information, please see my Disclosure Policy in the tab above.*


A-England Elaine


Color: Deep purple
Finish: Crème – a flat polish that finishes smooth with full opacity.
Bottle / Brush: Square bottle – long cap with standard size wand.  Average application with standard brush.
Opacity: High – opaque at two coats!
Glitter Application: N/A
Consistency: Medium – applies easily and doesn’t flood the cuticles.
Overall Ease of Application: Easy – applies well without pooling, dragging, streaking, or balding.  Spreads evenly and smoothly.
Stampability: Not tested for stamping.
Dry Time: Medium – dry to the touch with minimal smudging in 3-8 minutes. Overall Thoughts:  Elaine is the perfect purple creme.  It applies with ease and looks beautiful and smooth without any manipulation.  Just a perfect, creamy, vampy purple that looks great on its own as well as with glitters layered on top.  I purchased my A-Englands at Llarowe.


Sonoma Nail Art Sonoma Sunset


Color: Clear base with purple, periwinkle, gun metal, and fuchsia hexes
Finish: Glitter Top Coat – glitter in a clear base to be worn as a top coat.
Bottle / Brush: Round bottle brush – both the wand and the brush are standard width and length.  Easy to control and manipulate.
Opacity: Glitter topcoat – not designed for full opacity.
Glitter Application: Impossible – pools at the cuticles, difficult to spread the glitters evenly, leaves large bald spots unless you apply more than one coat.  You have to be careful because if you try to get enough glitter on your nail with just one coat, it will pool and bulge unevenly on one side and bubble when dry.  The glitter to base ratio is off.  This is two coats.
Consistency: Super thin – runny and floods the cuticles easily.
Overall Ease of Application: Hard – pools at the cuticles.  Does not spread well without massive manipulation.
 Stampability: Not designed for stamping.
Dry Time: Long – dry to the touch with minimal smudging in over 8 minutes. Overall Thoughts:  I think I'm just not in love with Sonoma's formula and consistency.  I love her glitter combinations, but every glitter topper I've tried has had a glitter-to-base ratio that leans heavily in favor of the base.  That's even after storing it upside down for quite a while and rolling to mix it!  I almost always have to use at least two coats to get the glitter coverage I want.  It's really pretty, though, and I love the effect over Elaine.  You can purchase Sonoma Nail Art polishes at her Etsy store.  Follow Michelle on Facebook for news on restocks and new additions to her line.   Oh, and so you know, she has polishes listed right now!  That's a bit of an anomaly.  If you want some of her pretties, get over there stat!


The Polish Bar Berry Shimmer


Color: Clear base with hot pink and purple hexes, squares, and shreds.
Finish: Glitter Top Coat – glitter in a clear base to be worn as a top coat.
Bottle / Brush: Round mini bottle – wand and brush are just long enough to reach the bottom of the bottle.  However, the fact that it’s a mini makes application a little tricky.  Requires a steady hand to apply evenly without pooling.
Opacity: Glitter topcoat – not designed for full opacity.
Glitter Application: Easy – Spreads evenly without much manipulation.
Consistency: Medium – applies easily and doesn’t flood the cuticles.
Overall Ease of Application: Easy – applies well without pooling, dragging, streaking, or balding.  Spreads evenly and smoothly.
Stampability: Not designed for stamping.
Dry Time: Quick – dry to the touch without smudging in under 3 minutes. Overall Thoughts: If you haven't tried out the Polish Bar, you should.  This is one of my favorite glitter toppers, and I'm sad I only have a mini!  I received this beauty in a hand-made polish swap I participate in every couple of months.  The consistency is perfect.  Unlike other glitter topcoats, it isn't clumpy and it doesn't pool or bulge.  It's bright and fun and goes well with Elaine topped with Sonoma Sunset.  The holo bits shine brightly and make this polish seriously bling-tastic.  Absolutely gorgeous!  You can purchase The Polish Bar polishes from her Etsy shop.  Also, follow Janice on Facebook for news and updates.

Which is your favorite glitter topper?