First, gather your polishes. I really wanted to go for a fetid decaying flesh look, so I grabbed black, a few greys, a blood red, and an army green. You'll also need to take a makeup sponge and tear it up into smaller pieces. Some people like to use tweezers for sponging, but I find it easier to do it with my fingers. You'll also need a brush with acetone to do the final step, a paper plate to drop your polishes onto for the sponges, and a paper towel for blotting your acetone brushes. Lastly, you may want to tape up your cuticles to help with cleanup, or you can use your brush with acetone for cleanup.
Essence Fateful Desire, Elevation Tindur, Elevation Ridnitsohkka, OPI At Your Quebec and Call, China Glaze Recycle, and China Glaze Liquid Leather
Next, drop a bit of the green polish onto the paper plate. Take your makeup sponge and dip it into the polish. Sponge the green onto the entire nail. I did two coats to get it bright and saturated. This layering is important for the last step.
Drop your darkest grey onto your paper plate and dip your makeup sponge into it. This time, don't cover your entire nail with the grey. Just go around your nail haphazardly and put the grey wherever you like it.
Do the same polish drop and makeup sponge technique with the remaining greys, red and black. You don't want do completely cover the nail with just one color at this point, so make sure that you can see bits of each color on your nail. Don't go too heavy on the red or black, so it looks like rotting open wounds. I use the plate to blot the red and black a little so they don't go on too thickly. The idea here is Zombie, after all!
Medium Grey
Light Grey
Blood Red
Black
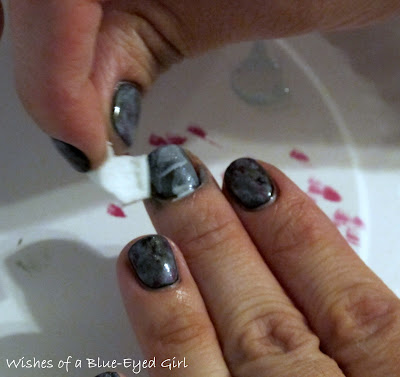
At this point, you can go ahead and do some cleanup with your brush and acetone.
ROFL! My cleanup brush has seen better days...
Once all of your nails have had the sponge treatment, wait a few minutes to let the polish dry enough so that you won't smear it when you do the next step. Intentional smearing is totally different from smudging the polish all the way to your nail, which I did at least twice, lol. Grab your brush and acetone. Dip your brush into the acetone and blot it on a paper towel. Next, LIGHTLY swipe your brush across your nail. Do this two or three times until you get a look you like. It's ok if you wipe off down to the black or green in bits, as it looks really cool like that. The point is to try to blend the colors together while you're swiping the brush across.
Once you're done, you can apply some fimo slices. Here, I'm using slices I purchased from Dollish Polish in one of her Halloween restocks. You can look up how to slice and use fimo sticks on youtube, which is what I did, but here's a quick how-to. Grab your slice with some tweezers. Make sure your polish is still wet, and place the fimo slice onto your nail where you want it. Press it down into the polish with your tweezers.
Now, apply a few layers of topcoat to seal it in.
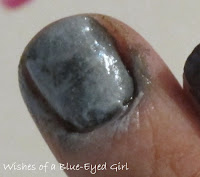
As you can see, I applied WAY TOO MUCH Seche Vite, so I've got some serious shrinkage going on. Check out how they look up close. I really love the look of fimo slices, but I hate how they stick out. Seriously, I felt like I had to use a million coats of SV to get it all to stay down. I probably didn't need to use that much, though. You live and learn!
After that, you're done! Here's the finished product!
(Extra huge pic so you can see the details a little better. Excuse the shrinkage...)
Here is a closeup of the blending. See how the green and black poke through a little?
So, there you have it! Those are my zombie nails! It takes a little bit of time to do, but I think it's pretty worth it. Although, I won't use too much Seche Vite next time. I purchased the OPI, which is discontinued, from a salon near my house. The China Glazes are still available at Sally's and ULTA. I received the Essence from a friend in a swap, but you can find Essence at ULTA. Lastly, you can purchase Elevations here, but they're currently closed until November.


These are amazing, thank you for the tutorial! I've gotta try these :-)
ReplyDeleteYou're so welcome! Did you give them a shot? If yes, I'd love to see a pic on my Facebook page!
Deletehaha that looks interesting! thanks for the detailed tutorial :D
ReplyDeleteBut of course!
DeleteI'm so using these for halloween!!
ReplyDeleteDid you decide to do this yesterday?! If yes, I'd love to see your take on it on my Facebook page!
DeleteThose fimos are adorable, but I think your colors really makes the 'zombie' theme come to life :)
ReplyDeleteThank you! I tried to make it look as rotten as I could. ;)
Delete