Showing posts with label OPI DS. Show all posts

Thursday, February 5, 2015

Comparison Thursday: Peachy-Orange OPI Holos


This week's comparison is a look at a few peach and orange holos I have from OPI.  All of these are discontinued and hard to find, unfortunately, but I still wanted to show them to you guys anyway.  Mainly because I wanted to see how they compared, so you guys get to reap the benefit!  Let's take a look.


Day at the Peach, DS Vintage, Coral Reef, DS Couture

I wanted to make sure that the holo flames weren't adversely affected by the use of topcoat, so I went without.  No topcoat on any of the polishes equals awful dry times.  


Day at the Peach


DatP has a super thin consistency.  Because of this thin consistency, it has a tendency to pool, but the smaller brush makes it easier to apply.  It's one of the older Summer for Shore Collection polishes, so it's got a fine holo particle.  Surprisingly, it was opaque in two coats, but I used three for my photos. I thought that it would take much more to build to opacity since the consistency was so runny.  And as I mentioned earlier, the dry time long without a quick dry topcoat.


DS Vintage


DS Vintage is one of the newer polishes, so it's got the new brush style.  The fat OPI brush makes application a little difficult on short nails, which is why I detest those fat flat brushes.  As compared to DatP, it's got a bit thicker consistency, so it's less likely to pool.  The DS line all have a larger holo particle than the Summer for Shore collection.  It's closest in color to DatP, but they're definitely not dupes.  It was easily opaque at two coats.  Again, dry time was long because I didn't use a quick dry topcoat.


Coral Reef


CR is another Summer for Shore polish, so it's a bit thin like DatP, but it doesn't pool as much.  It's very orange as compared to the others in this grouping.  CR has a fine holo particle like the rest of the Summer for Shore collection.  It's opaque in two coats, but I used three for my photos.  It's probably obvious now, but dry time was long because no topcoat.


DS Couture


DS Couture is one of the newer bottles so it's got that thicker OPI brush, which makes application difficult, like with Vintage.  It's on the thicker side, but there is still a tendency to pool on my skin.  Couture is the most red of the bunch.  It's also the most pigmented, and was easily opaque in one coat.  However, I used two coats for my photos.  Dry time was long, but not quite as bad as the others because I was able to do thinner coats due to the high pigmentation in this polish.

So, there you have it!  Those are all of my peachy-orange OPI holos.  I think my favorite is Couture because it's just so vibrant and fun.  Which is your favorite?

Friday, March 21, 2014

Comparison Friday: EP February 2014 - SPOILER!

If you don't want to know what Enchanted Polish February 2014 looks like, although I'm not sure how you could've escaped seeing a photo by now, you may want to skip this post.  Many people were curious about whether this polish was close to other EPs or other holos, or if it was unique amongst the multitude of holos out there.  I decided to take all possible dupes I had and compare them, so this will be an extremely long and photo heavy post.  Get ready, because here we go!

All polishes were purchased by me.

Do not pass Go if you don't want to see February 2014!!!!  I'm serious.  Don't scroll down unless you want to see February 2014!


The first two swatch photos of each grouping are shown in full sun while the rest are shown in indoor artificial sunlight.  The lighting can really change the color of the polish, so make sure you pay attention to the subtle differences.  All macro swatch shots are shown in full sunlight.

First, let's take a look at February 2014.  It's a plum shade that isn't quite purple, pink, or red but that has a pink micro flakie shimmer.  It's definitely a chameleon.  It's definitely pigmented enough to do just one coat, but I chose to do two for these photos to ensure that I had covered up anything that the camera would pick up and the naked eye wouldn't.  Dry time was quick.  Not only is this polish quite pigmented, but it's also pretty thick.  It was fairly easy to control on the nail, but you need to make sure that you don't get too much on the brush.


My first grouping to compare consisted of (from index to pinkie): Enchanted May 2013, Enchanted February 2014, OPI DS Signature, and Model City Polish More than Words.


Enchanted Polish May is thin, but not super thin.  All photos show two coats with one coat of KBShimmer Clearly on Top.  Required little cleanup and dried quickly.  It is much brighter and more purple than the rest in this grouping.  It is just a regular linear holo without any hidden shimmer or flakies.


OPI DS Signature is also two coats with one coat KBShimmer Clearly on Top.  It's the closest to February 2014 in this grouping, which doesn't mean much, but it leans much more pink than February.  This is the thinnest of the four polishes, so you have to be careful about pooling.  The larger pro-wide brush doesn't help in application.


Model City Polish More than Words is a gorgeous pink polish with pink micro glitters.  It's much more scattered than the rest in this grouping.  As always with Model City Polishes, it has a perfect consistency and applied without any need for cleanup.  This shows two coats with one coat of KBShimmer Clearly on Top.


The second grouping consists of (thumb to pinkie) Colors by Llarowe Dirty Diana, Enchanted Holiday 2013, Enchanted February 2014, Enchanted Mr. Burgundy, and Colors by Llarowe Good Golly Miss Molly.


CBL Dirty Diana is a red linear holographic that is brighter than February's dusty plum.  It's also more red than February which leans purple by comparison.  This is two coats without any need for cleanup.  Also unlike February, this is a straight holo without any extra glitters or shimmers.


EP Holiday 2013 is the darkest of all of the polishes in the review tonight.  It's a deep red that leans almost brown.  This is two coats, but it's definitely the thinnest of the group and required the most cleanup.


EP Mr. Burgundy is red, much like Dirty Diana, but it's a brown-red versus DD's cherry red leaning.  It also doesn't have any extra glitters or shimmers.  This is two coats with little cleanup.


CBL Good Golly Miss Molly is a bit of a deeper red than Dirty Diana and Mr. Burgundy, but it's still more red than February.  Again, GGMM is a straight linear holo without any shimmers or flakies.  This is two coats, but I could've used just one coat.  It required no cleanup and dried quickly.

The third, and last, group consists of Enchanted Mercy, Enchanted February 2014, Elevation Polish Haleakala, and Enchanted April 2013.


EP Mercy is one coat alone.  The opacity, however, interferes with the holo rainbow, so this is actually the least holo of all of the polishes in this post.  Furthermore, it's a more purple blue than red like February.  Application was perfect and required zero cleanup.


Elevation Haleakala is a bright red-purple holo without any extra shimmer, glitters, or flakies.  This is probably the closest to February except that it's a bit brighter and more vivid.  I used three coats of Haleakala, but I really probably could've just used two.  Application was easy, there was little cleanup, and dry time was quick.


EP April 2013 is the most purple of the comparison and includes blue shimmers.  Of the four in this set, April 2013 is the thinnest requiring three coats.  It's runny with the possibility of flooding the cuticles, so you've got to be careful with application.


And here are macros of all of the polishes in this comparison together.  Click on the photo for more details.


You can purchase Enchanted Polishes at her store, but the majority of these were one-time limited editions.  OPI DS linear holo polishes have been discontinued, but you can find them on blog sales or at salons.  You can purchase Model City Polishes here.  Follow the awesome Nina on Facebook and IG for news and updates.  Elevation Polish can be found at her store here.  Follow Lulu on IG for news and updates.  Lastly, you can purchase Colors by Llarowe here.

So, what do you think?  As you can tell from all of these photos, I don't own anything that's even remotely similar to EP February 2014.  Which is your favorite?

All polishes were purchased by me.

Monday, December 16, 2013

Hot pink!

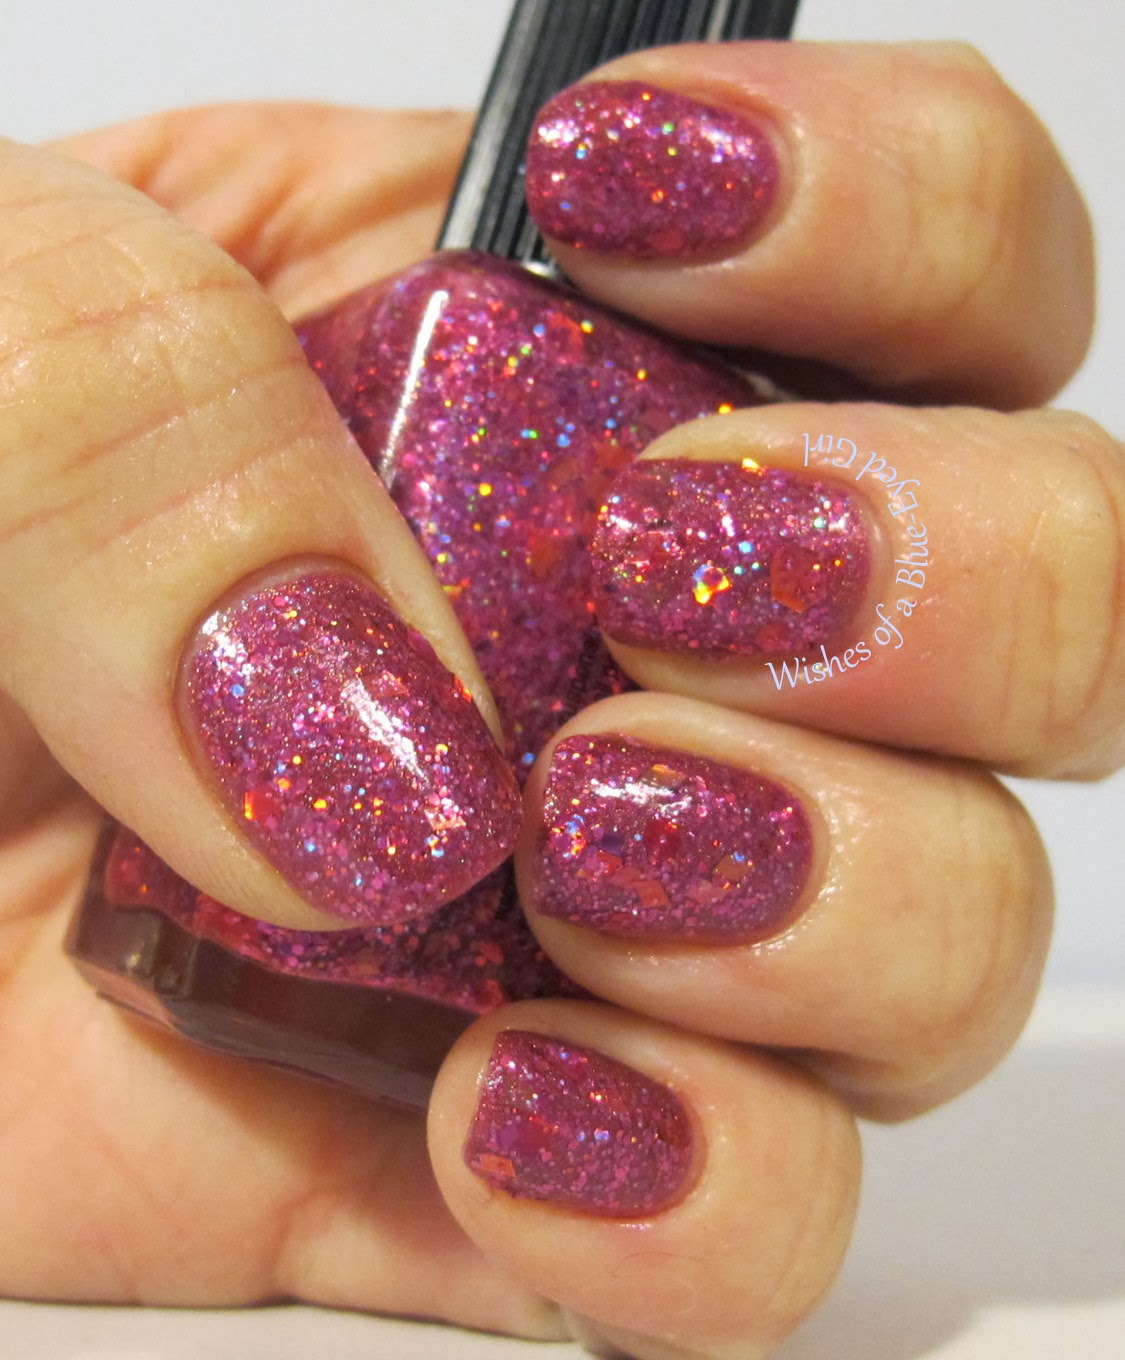
So, I know it's the middle of winter and everyone is doing holiday colors, but I was in the mood to show you guys a gorgeous hot pink.  Let's take a look at my first Limited Edition Lynnderella that I purchased myself instead of receiving it as a gift: Don't Drink this Pink.

*I was not financially compensated for this post.  All items in this review were purchased by me for my own use.  The opinions are completely my own based on my experience.  For more information, please see my Disclosure Policy in the tab above.*


Color: Hot pink glitter jelly with hot pink holographic glitters.
Finish: Glitter Jelly – glitter in a colored jelly base.


Bottle / Brush:  Rectangle bottle – ribbed cap that is a little hard on the hands to open if you have sensitive skin.  The wand is the standard length, but the brush is a little too thin to pick up large / shaped glitter without fishing.  The brush's width is also an issue for spreading.  It doesn't fan out and pretty much requires you to dab polishes that are densely packed with glitter.


Opacity:  Medium – achieves opacity at three coats, but here I've worn one coat over OPI DS Signature which is a bright pink linear holographic.
Glitter Application: Medium – requires the dab method, but glitters are easy to extract and spread evenly.


Consistency: Thick – thick or it can be clumpy, but is easily remedied with some polish thinner.
Overall Ease of Application: Medium – applies well with minimal pooling, dragging, streaking, or balding.  Spreads well with the dab method.


Stampability: Not designed for stamping.
Dry Time: Quick – dry to the touch without smudging in under 3 minutes.


Overall Thoughts: Holy crap you guys.  This polish is just so INSANELY packed full of hot pink glitters that it just gobbed on super easily, but it's definitely one of those polishes that requires the dab method.  I was able to get the larger glitters out easily despite the brush being thin.  I did leave it upside down for a while before applying.  It's a perfect pairing with DS Signature, too.  The base color and the color of the glitters are exactly the same shade of vibrant pink.  The only thing that makes me sad about this mani is the fact that you can't really see the in your face holo of Signature.  This polish is a MASSIVE topcoat eater, so make sure you either use a generous coat of Gelous, Glitter Food, or Glitter Tamer before putting on your topcoat.  


Sadly, this LE has been discontinued, but you may occasionally find one on a blog sale.  If you do, you need to snap it up as quickly as possible.  It's just.  that.  good.  Seriously.  I purchased my OPI DS Signature on a dusty hunt from a local salon that was a treasure trove of amazing old polishes.  You can purchase Lynnderellas at their store here.  Follow their fan-run FacebookTwitter, and IG pages.

*I was not financially compensated for this post.  All items in this review were purchased by me for my own use.  The opinions are completely my own based on my experience.  For more information, please see my Disclosure Policy in the tab above.*

Tuesday, May 28, 2013

Phoning it In: Dollish Polish

I'm working on making furniture tonight, but I wanted to make sure I got at least something up for you guys tonight.  Tonight, we're going to take a look at Dollish Polish A Peachy Princess from Dolly's Super Mario Brothers Collection that she released last fall.

*I was not financially compensated for this post.  All items in this review were purchased by me for my own use.  The opinions are completely my own based on my experience.  For more information, please see my Disclosure Policy in the tab above.*


Color: Light pink jelly with holo and matte pink squares and hexes.
Finish: Glitter Jelly – glitter in a colored jelly base.
Bottle / Brush: Skinny round bottle – long cap with standard size wand.  Some of these brushes come bent.  Average application with standard non-bent brush.  Picks up glitter decently, but it isn’t the best.


Opacity: Medium – achieves opacity at three to four coats.  Here, I've worn it with one very thick coat over OPI DS Opulence.
Glitter Application: Hard – difficult to dig the glitters out of the bottle, spreads well with the dab method, but pools at the cuticles and bubbles when dry.
Consistency: Thick – thick or it can be clumpy, but is easily remedied with some polish thinner.


Overall Ease of Application: Difficult – pools at the cuticles.  Drags and clumps, streaks, or is bald in spots.  Does not spread well without massive manipulation.
Stampability: Not designed for stamping. 
Dry Time: Long – dry to the touch with minimal smudging in over 8 minutes.  It felt like this polish would never dry.  It was insane!  


Overall Thoughts:  This was a pretty decent combo, but the application was such a pain.  It took the dab method to get it on my nail, but it slid around and pooled ta my cuticles.  It took FOR.EV.ER. to dry.  


I didn't even get to wear it for long because they started popping off left and right!  Talk about frustrating.  It's such a pretty polish, though, so I'm going to keep trying.  Sadly, Dolly's Super Mario Brothers collection has been discontinued, but they do show up in swap groups and blog sales all the time.  If you're interested, definitely keep an eye out there.

You can purchase Dollish Polishes at her shop, Llarowe, and Overall Beauty.  Follow Dolly on Facebook, Twitter, and Instagram for news and updates on new collections.

Do you have any video game inspired polishes?

Friday, May 24, 2013

OPI DS Signature

I had wanted to make today Comparison Friday since I missed out on Comparison Thursday yesterday, but then I saw these pictures in my queue and instantly changed my mind.  The OPI DS collection used to be so awesome.  The polishes from that line now are nice, but, in my opinion, not worth the extra price.  If you are able to find some of the holo DS's, grab them as quickly as you can as they are no longer made.  In fact, OPI has stated via their Facebook page that they no longer have access to the pigment they previously used for their holos and, thus, will no longer make holo polishes.  It's such a shame.  They were my longstanding favorites.  However, the new Color Club Halo Hues have edged the DS's out of the top position with their over-the-top bling.  Even still, one of my favorite holos is OPI DS Signature.


*I was not financially compensated for this post.  All items in this review were purchased by me for my own use.  The opinions are completely my own based on my experience.  For more information, please see my Disclosure Policy in the tab above.*


Color: Deep rose / muted fuchsia holographic.


Finish: Holographic – pigment gives polish a rainbow in the sunshine.


Bottle / Brush: OPI bottle with the new wide brush – if you have small nail beds, this brush may be too large for you.  The wide brush tends to cause the polish to flood your cuticles, so you have to be very careful when applying.  Don't get too much polish on the brush when you're ready to apply it to the nail.  The wand length and cap are both standard OPI, and has a pretty average application.


Opacity: Medium – achieves opacity at three to four coats.
Glitter Application: N/A
Consistency: Fluid – thin but flows easily from the brush.


Overall Ease of Application: Medium – applies well with minimal pooling, dragging, streaking, or balding.  Spreads well without much manipulation.
Stampability: Not tested for stamping.


Dry Time: Medium – dry to the touch with minimal smudging in 3-8 minutes.


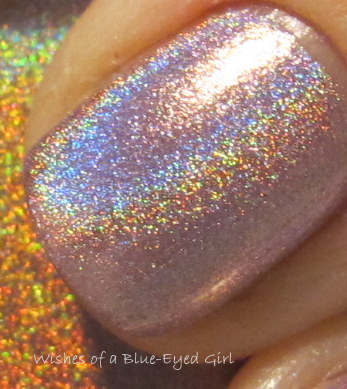
Overall Thoughts: Signature is probably one of my favorite holos.  It applies like a normal polish and isn't a massive pain in the butt like most holos.  The consistency is on the thin side, so you have to be careful with pooling, especially coupled with the wide brush.  Even though the layers are thin, coverage builds nicely in three coats.  It's so vivid, both in color and in rainbow, which is why it is one of my favorite holos.  The holo is more of a scattered-linear holo instead of a straight holo, but I almost like that better.  The holo particle OPI used for Signature is larger than the one used for straight holos like the new China Glaze Hologlam collection.  Overall, I love this polish.

Sadly, the holographic DS's are long discontinued.  I found mine at a local salon along with a few other DS's, and I grabbed them all as quickly as I could.  I was actually surprised when the salon owner sold them to me, and threw in DS Glamour for FREE.  I didn't tell him how much they were worth.  That was my little secret.  Heheheh.  You can purchase their new DS's at salons, Ulta, and other places where OPI are sold.

What's your favorite pink holo?

Thursday, May 2, 2013

Comparison Thursday: Lilac Holos

Tonight's Comparison Thursday will be a little disjointed, and I apologize for that.  Originally, the only two lilac holos I owned were A-England Princess Tears and Color Club Fashion Addict, so I had planned to do this post a very long time ago with just those two polishes.  I'm really glad I waited, though, because I was able to add three other polishes to the line-up.  However, I didn't have all of these beauties at the same time, so the line-up photos will be a little off as I had sold Fashion Addict before I did the final comparison swatches.  Womp womp!  Anyway, let's get to it!

The players: Color Club Cloud Nine, A-England Princess Tears, OPI DS Diamond, China Glaze Visit me in Prism, and Color Club Fashion Addict


Cloud Nine


Well.  I think we should address the massive elephant in the room first.  There's clearly one obvious winner in this bunch - Cloud Nine.  Let's tackle it head on, and then maybe we can take a look at the others that pale in comparison to this amazing work of art.  The linear holo is so bright in Cloud Nine that it's blinding.  The rainbow effect is so strong that the polish almost looks like it has a foil effect to it.  Unfortunately, application was a bit more tricky than some of the others.  You have to work quickly with application to keep it from balding and dragging.  Further, it definitely shows every. single. imperfection. in your nail, so buff it with a shine block or use an aqua base before you apply.  Excuse my smudge!  I purchased my Color Club Halo Hues on Amazon.com.


Princess Tears


Princess Tears is unique to the bunch because it has a very pretty lilac to pink shimmer on top of the holo effect.  Application for all of the A-Englands I've tried has been amazing, and Princess Tears is no exception.  The only down side is that the holo isn't nearly as strong as other holos I own, especially when it's put right next to Cloud Nine.  It's almost unfair to poor pretty Princess Tears...  I purchased my A-Englands on Llarowe.


DS Diamond


I'm not going to lie.  I was extremely disappointed with this DS, which, I guess, is because I'm used to the linear beauties from the older DS line.  Sadly, Diamond was a scattered holo that wasn't even really all that holo.  It's like it wanted to be holo, but it fell short.  Application was a bit difficult because it had the tendency to flood the cuticles.  Since Diamond has been discontinued, I found mine while I was out dusty hunting at a salon.


Visit me in Prism


Visit me in Prism was another dusty find, but I've got to say that I liked it way more than Diamond!  Application was easy but a little watery.  This is four thin coats, and I had to be a little careful with application to make sure I wouldn't flood my cuticles.  Prism is a scattered holo, but the colors refract the light perfectly, and it's probably my second favorite next to Cloud Nine!  Again, since this polish has been discontinued, you'll need to check your local salons to see if they have any they'd be willing to sell.


Fashion Addict


Fashion Addict is another scattered holo that shows up alright in the sun.  It's a little lighter than the rest and its rainbow effect is middle of the range.  Sadly, it's another polish that will show every imperfection on your nail.  Case in point, my index finger.  Ugh.  It also flooded my cuticles pretty easily.  You can purchase Fashion Addict where core Color Club colors are sold.  I believe I saw a few at my Bed Bath and Beyond the last time I was in there.


So, there you have it!  My pick from this bunch is obviously Cloud Nine.  How could it not be?  But each one of these polishes has its own unique positive points.  I will say, though, that you really don't need all of them if you're looking to de-dupe or destash.  Although, these are all really good for collecting if you're looking to keep collections together.  I ended up selling all but Cloud Nine, but that's because I'm moving.  

Which is your favorite?