Showing posts with label Sonoma Nail Art. Show all posts

Friday, May 23, 2014

Comparison Friday: Blue and Green Glitters

What what what is this?!  A blog post from little old me?  And a comparison no less!  The world MUST be coming to an end!  Hahah!  So, this past month and a half (almost 2 months), I've been without any contract work.  I've been working on a pro bono case some, but mainly I've been busting my hump on Blue-Eyed Girl Lacquers.  One would think that sitting at home all day would make it easy for me to blog more often, or at least to set up blog posts to auto-post, but apparently not.  And now that I have a gig again, I'm blogging again - even after working a 10 hour billable day and getting almost all of the outstanding BEGL orders packaged, weighed, and labeled!  I think it's an understatement when I say that I am pretty pooped.  I hate getting off a normal sleep schedule, so me staying up until 4 am some mornings this past month really hasn't helped much these past few days when I've had to be up early.  Bah!  Anyway, enough about me, let's get to the good stuff!  Tonight's post is an old one, as is evidenced by my old lighting setup and long-for-me nails (I've been rocking shorties and nubs for the past year, oy!).  This will be a short but sweet post, so hold on to your butts!


All polishes in tonight's post were purchased by me.

Tonight, I'm going to show you two blue and green glitters that, from the bottle, I thought would look a little bit closer on the nail.  I was definitely wrong.  Let's take a look at Pretty & Polished Beach Bum and Sonoma Nail Art 20,000 Leagues Under the Sea.

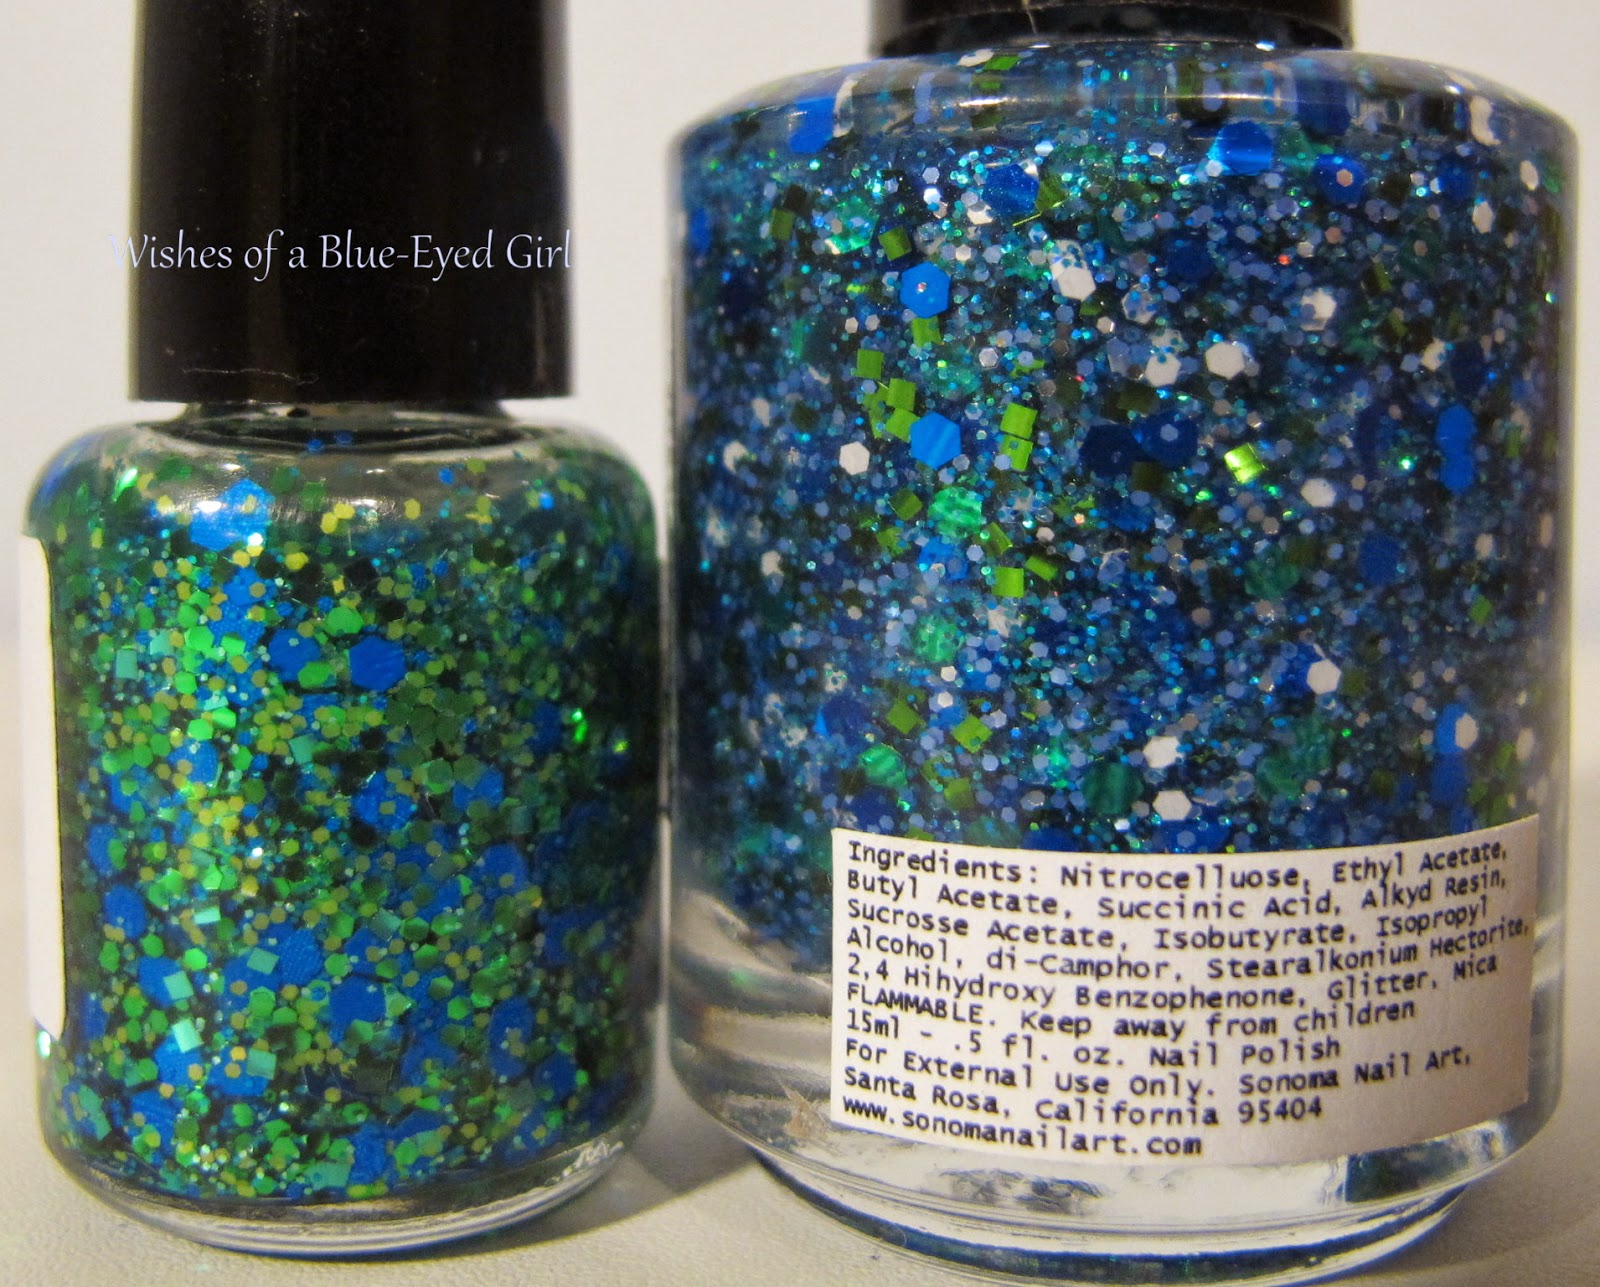

As you can see, they are both clear glitter toppers with predominantly green and blue glitters.  Neither are designed to be worn in layers without undies, so they are both definitely toppers.  All photos show one coat of each over Ozatic 517 in artificial light.


As you can see on the nail, however, Beach Bum has more green than blue and 20,000 Leagues has more blue than green.  Beach Bum also has a few gold glitters, while 20,000 Leagues has some white added in for good measure.


Beach Bum has more larger sized glitters than 20,000 Leagues, which has many more micro-glitters floating around in the mix.  


Also, the bases in these two were starkly different.  Beach Bum has a super super slight green tint from the glitters, which obscures the holo in the undies a little more than 20,000 Leagues.  It is also denser with more glitters in the base than 20,000 Leagues.  The base in 20,000 Leagues is crystal clear.  However, the base to glitter ratio is waaaaay more in favor of base to glitter.  If you're not careful, you'll get pooling if you try to get too much glitter on the brush.  As you can see, there aren't very many glitters on my nail, which was a bummer.


You can purchase Pretty & Polished polishes at her store here.  Follow her on Facebook, Twitter, and IG.  You can purchase Sonoma Nail Art at her store.  Follow her on Facebook, Twitter, and IG for news and updates.

Wednesday, February 26, 2014

Dusty Pinks

So, I've been off of work for the past week and have had all of these grand plans to do stuff around the house, with the blog, and with the polish-making.  But what have I done?  Played with polish.  I've only played with polish...  Yeah.  I have so much I need to do, but I just can't make myself do anything that isn't fun!  Surprise vacation has been fun, but it's time to get myself in gear.  Tonight's post is a couple of pretty, dainty, and dusty pinks: Illamasqua Pink Raindrops and Sonoma Tiny Tangerines.

All polishes were purchased by me.


Pink Raindrops

Color: Dusty dainty pink with silver flakies and pink shimmers.


Finish: Flakie - a polish (creme or jelly) filled with flakes of irregularly shaped glitters.  Some flakies are iridescent or color changing while others are one color but provide added depth.
Bottle / Brush: Rectangular with square top - bottle shape is average for a rectangular bottle.  The top is square, which is a massive pain in the butt when it decides it doesn't want to come off - like with my bottle of Pink Raindrops.  It is short and squat which can make maneuvering a bit difficult.  The wand and brush are both average with average application, but the shape of the top is irritating for me.  It’s probably my least favorite top when it decides to not come off.
Opacity: High – opaque at one to two coats! Here, I've done two coats for the photos.


Glitter Application: Easy – Spreads evenly without much manipulation.
Consistency: Thick – thick or it can be clumpy, but is easily remedied with some polish thinner.
Overall Ease of Application: Hard – applies with some pooling, dragging, streaking, or balding.  Spreads well with manipulation.  Requires quick work to get a smooth result.
Stampability: Not tested for stamping.
Dry Time: Long – dry to the touch with minimal smudging in over 8 minutes.


Overall Thoughts: I'm so so so annoyed with the top on this Illamasqua bottle. I mean, for real. If the square top would come off like it does for my other Illamasquas, or Diors and Chanels, it wouldn't be such a big deal. However, the fact that it doesn't makes it super hard for me to hold and control. I could probably get it off with a pair of pliers, but since I'm going to be adding it to my blog sale, I didn't want to run the risk of damaging the top. Oh well, c'est la vie, I suppose. The first time I tried out Pink Raindrops, it was a thick and clumpy mess. I couldn't get it to cover without pooling and dragging like a matte. The second time I wore it (for these photos), it was a little easier to work with since I knew what I was dealing with. It's one of those polishes where you need to work quickly to get it on the nail and yet wait for a decent amount of time between layers for the polish to dry. I purchased my Pink Raindrops from a blog sale, but you can purchase Illamasquas from Sephora or on their website.


Tiny Tangerines

Color: Pale pink creme with white, pink, aqua, and purple hexes and baby pink hearts.


Finish: Glitter Crème – glitter in a crème base.
Bottle / Brush: Round bottle (i.e. Seche Vite) – the brush and wand are the standard width and length.  Easy to control and manipulate.
Opacity: Medium – achieves opacity at three to four coats. Here, however, I've worn it as one coat over Pink Raindrops.
Glitter Application: Medium – requires the dab method, but spreads evenly.
Consistency: Fluid – thin but flows easily from the brush.


Overall Ease of Application: Medium – applies well with minimal pooling, dragging, streaking, or balding.  Spreads well without much manipulation.
Stampability: Not designed for stamping.
Dry Time: Medium – dry to the touch with minimal smudging in 3-8 minutes.


Overall Thoughts: Tiny Tangerines was the perfect match for Pink Raindrops. It was an average glitter that had easy removal. The glitters came out of the bottle easily and spread well with the dab method. Dry time was average. This is just one coat over undies, so you can see that the glitter to base ratio is in favor of the glitters. You can purchase Sonoma polishes at her store here. Follow her on Facebook and IG for news and updates.

Monday, April 22, 2013

Purple Sparkles!


This is going to be interesting...  Let's take a look at three different polishes tonight!  A-England Elaine, Sonoma Nail Art Sonoma Sunset, and a Polish Bar prototype that became Berry Shimmer.  I'm going to attempt to do this in as much order as I can, so I hope it doesn't get too convoluted!

*I was not financially compensated for this post.  All items in this review were purchased by me or swapped for by me for my own use.  The opinions are completely my own based on my experience.  For more information, please see my Disclosure Policy in the tab above.*


A-England Elaine


Color: Deep purple
Finish: Crème – a flat polish that finishes smooth with full opacity.
Bottle / Brush: Square bottle – long cap with standard size wand.  Average application with standard brush.
Opacity: High – opaque at two coats!
Glitter Application: N/A
Consistency: Medium – applies easily and doesn’t flood the cuticles.
Overall Ease of Application: Easy – applies well without pooling, dragging, streaking, or balding.  Spreads evenly and smoothly.
Stampability: Not tested for stamping.
Dry Time: Medium – dry to the touch with minimal smudging in 3-8 minutes. Overall Thoughts:  Elaine is the perfect purple creme.  It applies with ease and looks beautiful and smooth without any manipulation.  Just a perfect, creamy, vampy purple that looks great on its own as well as with glitters layered on top.  I purchased my A-Englands at Llarowe.


Sonoma Nail Art Sonoma Sunset


Color: Clear base with purple, periwinkle, gun metal, and fuchsia hexes
Finish: Glitter Top Coat – glitter in a clear base to be worn as a top coat.
Bottle / Brush: Round bottle brush – both the wand and the brush are standard width and length.  Easy to control and manipulate.
Opacity: Glitter topcoat – not designed for full opacity.
Glitter Application: Impossible – pools at the cuticles, difficult to spread the glitters evenly, leaves large bald spots unless you apply more than one coat.  You have to be careful because if you try to get enough glitter on your nail with just one coat, it will pool and bulge unevenly on one side and bubble when dry.  The glitter to base ratio is off.  This is two coats.
Consistency: Super thin – runny and floods the cuticles easily.
Overall Ease of Application: Hard – pools at the cuticles.  Does not spread well without massive manipulation.
 Stampability: Not designed for stamping.
Dry Time: Long – dry to the touch with minimal smudging in over 8 minutes. Overall Thoughts:  I think I'm just not in love with Sonoma's formula and consistency.  I love her glitter combinations, but every glitter topper I've tried has had a glitter-to-base ratio that leans heavily in favor of the base.  That's even after storing it upside down for quite a while and rolling to mix it!  I almost always have to use at least two coats to get the glitter coverage I want.  It's really pretty, though, and I love the effect over Elaine.  You can purchase Sonoma Nail Art polishes at her Etsy store.  Follow Michelle on Facebook for news on restocks and new additions to her line.   Oh, and so you know, she has polishes listed right now!  That's a bit of an anomaly.  If you want some of her pretties, get over there stat!


The Polish Bar Berry Shimmer


Color: Clear base with hot pink and purple hexes, squares, and shreds.
Finish: Glitter Top Coat – glitter in a clear base to be worn as a top coat.
Bottle / Brush: Round mini bottle – wand and brush are just long enough to reach the bottom of the bottle.  However, the fact that it’s a mini makes application a little tricky.  Requires a steady hand to apply evenly without pooling.
Opacity: Glitter topcoat – not designed for full opacity.
Glitter Application: Easy – Spreads evenly without much manipulation.
Consistency: Medium – applies easily and doesn’t flood the cuticles.
Overall Ease of Application: Easy – applies well without pooling, dragging, streaking, or balding.  Spreads evenly and smoothly.
Stampability: Not designed for stamping.
Dry Time: Quick – dry to the touch without smudging in under 3 minutes. Overall Thoughts: If you haven't tried out the Polish Bar, you should.  This is one of my favorite glitter toppers, and I'm sad I only have a mini!  I received this beauty in a hand-made polish swap I participate in every couple of months.  The consistency is perfect.  Unlike other glitter topcoats, it isn't clumpy and it doesn't pool or bulge.  It's bright and fun and goes well with Elaine topped with Sonoma Sunset.  The holo bits shine brightly and make this polish seriously bling-tastic.  Absolutely gorgeous!  You can purchase The Polish Bar polishes from her Etsy shop.  Also, follow Janice on Facebook for news and updates.

Which is your favorite glitter topper?

Tuesday, October 30, 2012

It's Almost Halloween!!!

HOOOOORAY!!!!!!!!!!!  I love Halloween more than I can truly express.  Unfortunately, the past few weeks have been very busy with work.  At my old job, I was able to wear pretty much anything on my nails.  Now, however, I have to be very conservative as I try to schmooze clients and networking contacts.  I have only had time to truly wear three of my Halloween polishes so far, so my plan is to just extend Halloween a little bit.  As of right now, I don't have any professional meetings the rest of this week after I go to court in the morning.  I'm really excited that I will finally get to test drive some of these gorgeous Halloween polishes I've been hording, lol!

Today, I'm going to show you China Glaze LOL, Crows Toes Cheshire, and Sonoma Nail Art Halloween in the Vines.


China Glaze LOL is from the OMG collection that was released in 2009.  Sadly, it has been discontinued.  It's a gorgeous purple linear holographic polish that was a bit of a pain in the butt to apply.  Some holographic polishes dry so quickly that they drag and clump while you're painting, and LOL was no exception.  You have to make sure your base coat is completely dry or you'll definitely get clumping.  The key is to work quickly.  I didn't get any shots of LOL by itself, which is a shame because it is seriously the most gorgeous polish from the OMG collection that I've worn so far.

I chose Crows Toes Cheshire for four fingers on this hand and an accent on my righty.  Then, I decided to toss Sonoma Nail Art Halloween in the Vines as an accent on lefty and on four fingers on righty.  They worked really well together.  Like all Crows Toes, Cheshire was quite thick.  I definitely needed to add thinner to this guy!  It's best applied with the dab method.  Halloween in the Vines was a bit runny.  You can't really use the dab method or else it will pool at your cuticles and leave bubbles when it dries.  This is 3 coats over LOL before I was able to get the coverage I wanted.


Cheshire is made up of a clear base with fuchsia, gold, and purple glitters.  Look at that massive fuchsia hex!!  They were very easy to get out of the bottle, but I stored it upside down for a few minutes before applying.


Halloween in the Vines is a clear based polish with purple, fuchsia, and gunmetal hexes.  It takes quite a lot to get fuller coverage, which is why I chose to use three coats instead of attempting to dab.


As you can tell in this intentionally blurry shot, Halloween in the Vines is not as bright and in your face as Cheshire.  I think the gold in Cheshire adds that extra umph that is lacking in Halloween in the Vines.  Don't get me wrong, I love Halloween in the Vines!  It's just more subdued than Cheshire.


I really like the way this manicure turned out.  Although, I don't usually associate Halloween with purple, but it's still really pretty.  Sadly, LOL has been discontinued.  I found my bottle in a local nail salon.  You can purchase Crows Toes at Llarowe and Overall Beauty.  You can purchase Sonoma Nail Art at her Etsy store.  Sonoma's restocks are infrequent, and she usually only stocks a few bottles at a time.  If you want Sonoma polishes, you'll have to work fast when she restocks.  Although, right now there are a few polishes left from her restock earlier today, including Halloween in the Vines!  Act quickly if you want one of these!!  Check her Facebook page for news on restocks.

Do you have any of the OMG polishes?

Thursday, October 4, 2012

Comparison Thursday: Vampy Red Glitters

Well, since everyone is talking about Dollish Polish Vampires Coven and its similarity to Lynnderella Very Pretty Vampire, I decided I would toss my comparison into the ring with everyone else's!  Today, I'm going to show you a comparison between Sonoma Nail Art Deadly Zins, Dollish Polish Vampires Coven, Lynnderella Very Pretty Vampire, and Lynnderella Vampink.


Vampink is the outlier here since it is made up fine holographic glitters with larger multi colored hexes in a purple base.  I just thought I'd toss it in since I had it.  Most of these polishes have a mix of red, wine, and black glitters.  Deadly Zins has a slightly red tinted base whereas Vampires Coven and VPV have black tinted bases.  Here is a shot of each polish with just one coat.


Here they are with three coats.


Deadly Zins was pretty easy to apply.  It did require a little glitter manipulation, but the base went on smoothly without any pooling.  With dark undies, Deadly Zins actually fits in well with VC and VPV.  Vampires Coven went on easily as well and didn't require any manipulation at all.  VPV required some thinning, but I'm not sure if it's because it's old or what.  It was a bit clumpy, but it applied a little better once I added the thinner.  Vampink was a MASSIVE pain in the butt.  It was completely clumpy when I got it.  I received it in a swap, but I'm pretty sure it's a formula issue.  I added some thinner, but I ended up adding too much.  It pooled up all over my cuticles, and once those micro glitters got on my skin they wouldn't budge.  I'm kind of glad I didn't buy a full bottle!  My swatch didn't come out like the others I've seen online.  I'm going to give it another try, though, before I completely write it off because those swatches are just so gorgeous!

Now for some macro shots.

Deadly Zins


Deadly Zins with dark undies


Vampires Coven


Very Pretty Vampire


Vampink


Here are the purchasing details for each of these polishes: Sonoma Nail Art's Etsy shop, blog, and Facebook; Dollish Polish's Bigcartel shop and Facebook; Lynnderella's eBay shop (sign up on eBay to receive newsletters) and blog.

Which is your favorite?